The route is easier to plan once you treat the map as a logistics tool, not just a line on the coast
- The full trail is 226.5 km over 13 one-day stages, and it can be walked in both directions.
- The route is exclusively for walkers, with long sandy stretches, exposed cliffs, and sections that are not friendly to anyone with vertigo.
- The official paper map is a 1:55,000 topographic map; the interactive map adds accommodation, restaurants, and transport.
- The recommended walking window is generally September to June, with spring and autumn usually the most comfortable.
- There is no wild camping, so overnight planning matters as much as navigation.
- After storms, the warning map matters more than an old screenshot or a saved pin.
What the Fishermen’s Trail actually is
The Fishermen’s Trail is the coastal branch of the Rota Vicentina network, running along the wild southwest edge of Portugal. In practice, I think of it as a point-to-point hiking route that follows paths once used by local fishermen to reach beaches and fishing spots, which explains why it stays so close to the ocean and why it feels more demanding than a typical inland trail.
The classic through-hike starts in Porto Covo and finishes in Lagos, although the route can be walked in either direction and in shorter blocks. The official trail layout is simple on paper: 13 one-day stages, a maximum day length of 22.5 km, and a general difficulty level that sits in the “somewhat difficult” range. That is not because the route is technically hard in the alpine sense; it is because the ground is often sandy, the cliffs are exposed, and the wind can make a modest distance feel longer than it looks.
There are also a few rules that matter when you plan the map. The trail is meant to be walked only on foot, wild camping is not allowed, and the dune ecosystem is protected. I would also take the vertigo warning seriously. The edge walking is part of the appeal, but it is exactly what makes this route unsuitable for everyone. Once you understand that character, the map starts to make sense in a more practical way.
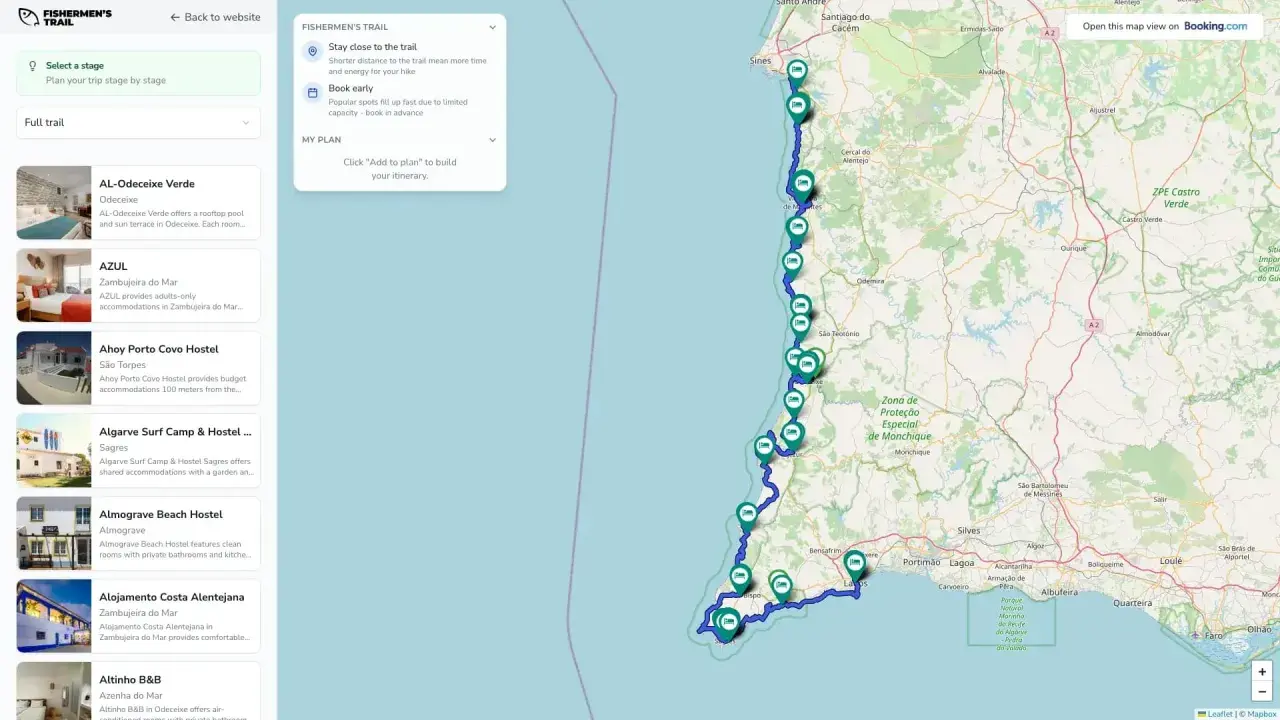
How to read the official map without guessing
The route map is most useful when you stop expecting it to be a simple navigation aid and start using it as a planning system. It shows the trail itself, the services around it, and the relationship between one stage and the next, which is what most hikers actually need when they are trying to book a realistic trip.
| Map tool | What it helps with | Best use |
|---|---|---|
| Paper topographic map | Overview, terrain context, stage layout, and distance sense | Route planning before the trip and backup navigation on the trail |
| Interactive map | Accommodation, restaurants, transport, and nearby services | Booking and logistics before each hiking day |
| GPX tracks | Exact trail line and stage-by-stage navigation | Offline use on a phone, watch, or GPS device |
| Warning map | Closures, incidents, and weather-related alerts | Final check before departure, especially after storms |
The official paper map is a 1:55,000 topographic map that is dust and splash resistant, and it includes the Fishermen’s Trail, the Historical Way, and the Circular Routes. That scale is detailed enough for stage planning without becoming cluttered, which is exactly what you want on a coastal trek where the nearest fallback point may be a village several kilometers away. I also like that it forces me to think in context: not just “where is the line?” but “where are the services, the exits, and the places I can realistically sleep?”
The interactive map is the better choice for practical day-to-day logistics. It is where I would check nearby accommodation, restaurants, and transport, especially if I am stitching together a partial itinerary instead of hiking the whole route. The GPX files are the third layer, and I would never treat them as optional on a trail like this. The coastline is well marked, but sand, wind, and visibility changes can still make a phone backup worth its weight in gold.
If you want one simple rule, use the paper map for the big picture, the interactive map for bookings, and GPX for the trail itself. That combination is what keeps the planning realistic, which leads naturally to the bigger question: which part of the trail should you actually walk?
How to choose a section that fits your time
Not everyone needs to hike the full coast from end to end. In fact, I think the best trip is often the one that matches your available days instead of forcing a heroic itinerary that leaves you exhausted by stage three. Because the route can be walked in both directions, you have more freedom than you might expect, and that makes the map especially useful for choosing a workable block of trail.
If you only have a few days, I would use the map to pick one continuous stretch rather than mixing random stages. The northern coast around Porto Covo, Vila Nova de Milfontes, Almograve, and Zambujeira do Mar gives you the signature dune-and-cliff experience without immediately jumping to the hardest terrain. Farther south, the Algarve sections near Arrifana, Carrapateira, Vila do Bispo, Sagres, Salema, and Lagos bring the dramatic cliff walking that many hikers picture when they imagine the route.
One of the most memorable official stages is the stretch from Sagres to Salema, which is repeatedly described as one of the toughest parts of the trail because of the constant ups and downs along the cliffs. That is a good example of why the map matters: two sections may look similar in distance, yet feel completely different on the ground depending on exposure, footing, and elevation changes. If you are choosing between sections, I would make the decision based on terrain character first and mileage second.
For a first-time visit, I usually recommend one of three approaches: a full 13-stage crossing if you have the time, a 3 to 5 day coastal block if you want a proper feel for the route, or a single stage if your goal is to sample the landscape without dealing with luggage transfers. The map supports all three approaches, but it does not decide for you which one matches your pace. That is why the next factor is weather, because on this coast the same stage can feel very different depending on the season.
When to walk it and what conditions matter
The recommended period for walking the Rota Vicentina network is generally September to June, and that is the window I would use as a baseline. Autumn is usually mild, winter is the rainiest period, and spring brings brighter colors and more comfortable temperatures. Summer is where I become more cautious, not because the route is impossible, but because the exposure, heat, and sand can turn a beautiful day into a punishing one.
What matters most on this trail is not just the calendar date but the combination of wind, rain, tide, and ground stability. After storms, the route can be affected by flooding, fallen trees, slippery ground, and unstable slopes. That is why a fresh warning check is important even if your map is otherwise perfect. A printed line on paper cannot tell you that a section has become risky after several days of saturated soil.
There is also a tide factor on some coastal sections, especially where the route gets close to beaches or cliff-base passages. I would never assume every stage is equally walkable at any hour. If the stage notes or local alerts mention tide-sensitive sections, I plan those days with a margin of time instead of trying to force the timing. On a route like this, patience usually beats improvisation.
The terrain itself adds another layer of caution. Around 60% to 70% of the trail is sandy, and the cliffs are in constant erosion. That means footing can change faster than a static map can capture. So yes, the map is essential, but on this coast the map works best when you pair it with live conditions. That naturally brings us to the part many travelers underestimate: how to get to the trail and keep the nights simple.
Getting to the trail and planning the nights
For most travelers coming from the United States, the easiest gateways are Lisbon and Faro. Lisbon is usually the more flexible choice for reaching the northern part of the route, while Faro works well for the southern Algarve end. From Lisbon, regional buses serve Porto Covo, and from Faro there are buses to Lagos. That is enough to make a self-planned hike workable without renting a car, as long as you accept that some transfers take longer than the straight-line map suggests.
I would not overcomplicate the overnight plan. Since there is no wild camping, the trail really wants you to think in terms of beds, not bivouacs. The official trail network has accommodation and other services along the entire route, which makes point-to-point walking realistic, but only if you book with the stage rhythm in mind. A map without overnight anchors is only half a plan.
If I were traveling with luggage, I would also consider a transfer service or a local taxi partner for the days when I need to connect trailheads, accommodation, and baggage drop-offs. Some routes in the region operate only on weekdays, so I would not assume that a bus timetable will fit a hiking calendar automatically. That is a small detail until it becomes the reason you lose half a day. The good news is that the route has enough infrastructure that you can usually solve this with a bit of advance planning.
A practical way to think about the logistics is simple: choose your start point first, then decide whether you are walking continuously, staying in one base, or mixing hiking days with transfers. Once that is settled, the map becomes much easier to use because it is no longer carrying the whole trip by itself.
The simplest way to use the map well before you go
Here is the way I would prepare for this trail if I wanted the map to actually help me on the ground. First, I would download the GPX tracks for the stages I plan to walk and save them offline. Second, I would mark the overnight stops and backup transport options on the map so I know where I can shorten a day if weather or fatigue changes the plan. Third, I would check the warning map the day before each stage, especially after rain or strong wind.
- Carry more water than you think you need, especially on sandy and exposed sections.
- Start early so you are not forced to rush the cliffs in afternoon heat or fading light.
- Use the paper map for orientation and the phone only as a backup, not the other way around.
- Respect the trail markings and avoid shortcuts through dunes or eroded cliff edges.
- Book accommodation before you start, because the route is popular in the best months.
The part that matters most is this: the Fishermen’s Trail rewards good planning, not just fitness. If you use the map as a system, not a souvenir, the route becomes much more manageable and a lot more enjoyable. That is the difference between a stressful coastal march and a trip that actually lets you notice the sea, the villages, and the landscape around you.