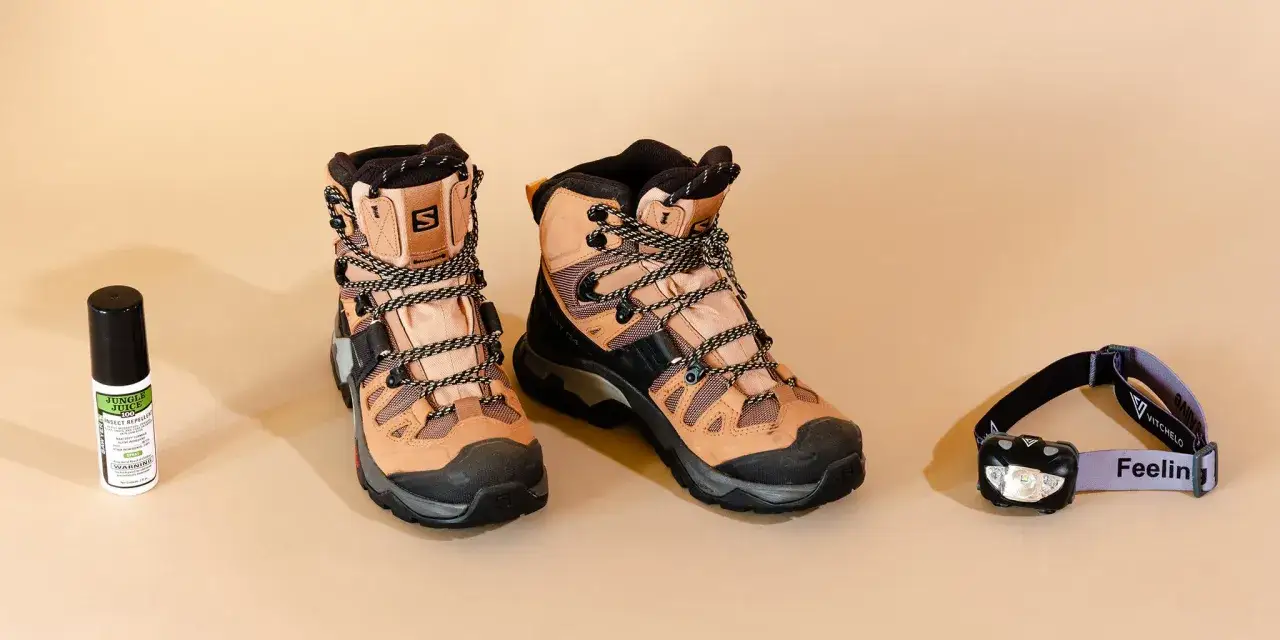
Rugged hiking footwear starts with the part that gets scraped, soaked, and folded every mile: the upper. In hiking footwear, sturdy uppers are what keep a boot protective after the first week, not just on the showroom floor. This guide breaks down what those uppers actually do, which materials are worth trusting, and how to tell when extra toughness is real versus just heavy-looking packaging.
The short version for trail buyers
- Leather usually wins on abrasion resistance and long-term durability, but it adds weight and break-in time.
- Synthetics are lighter and breathe better, yet they tend to wear faster at flex points and stitching lines.
- Hybrids are often the sweet spot for hikers who want protection without carrying a full leather boot.
- Look beyond the label and inspect overlays, stitching, toe protection, tongue design, and how the upper is bonded to the sole.
- A strong upper still fails if the fit is sloppy, so comfort and heel lock matter as much as material.
- Cleaning mud, drying slowly, and reproofing when water stops beading will extend the life of the boot more than most people expect.
What a durable upper actually does on the trail
The upper is not just a shell around your foot. It absorbs abrasion from rocks and roots, keeps grit out of the shoe, and holds the lacing system together when you tighten up for steep climbs or loose descents. Once that structure starts to collapse, the boot feels sloppy long before the outsole is worn out.
I care about the upper because it is usually the first part to fail in real trail use. Toe caps get scuffed on talus, the forefoot creases where the boot bends, and the collar wears down from repeated ankle movement. If those weak points are built well, the boot can keep doing its job for seasons instead of months.
Durability also affects weather performance. A more robust upper resists splash, brush, and repeated wet-dry cycles better than a thin fabric panel, but it can also run warmer and dry more slowly. That tradeoff becomes obvious on long hikes, especially when the trail mixes mud, rock, and steady mileage. From here, the next question is simple: what materials actually justify the extra cost?
Which materials are worth your money
There is no single perfect upper. The best choice depends on how hard you hike, how much weight you carry, and whether you care more about breathability or long-term punishment resistance. The table below is the practical version.
| Material | Why it holds up | Tradeoffs | Best use |
|---|---|---|---|
| Full-grain leather | Excellent abrasion resistance, strong structure, and the ability to mold to the foot over time. | Heavier, warmer, slower to dry, and usually needs more break-in. | Heavy backpacking, rough terrain, frequent brush, and long-term use. |
| Nubuck or suede with reinforcements | More flexible than full-grain leather while still offering solid durability and decent weather resistance when treated. | Needs care, can stain easily, and may not outlast a true full-grain build. | Mixed hiking where you want a balance of toughness and comfort. |
| Synthetic textiles and mesh | Lightweight, breathable, and quick to dry, especially in hot or wet climates. | Usually less abrasion-resistant, and seam or overlay wear shows up sooner. | Day hikes, fast hiking, and warm-weather travel. |
| Hybrid uppers | Combine leather panels, textiles, and welded reinforcements to reduce weight without giving up all protection. | Quality varies a lot from model to model, so you have to inspect the build closely. | Most hikers who want one boot for varied conditions. |
One detail I watch closely is the rand, the protective strip around the lower edge of the boot. A solid rand can save an upper from early failure when you kick rock or scrape roots. Overlays matter too, but they need to be anchored well; pretty-looking reinforcement is useless if it peels at the flex line after a few wet weekends. Once you know the materials, the next step is learning how to judge the build in person.
How to spot real durability before you buy
Most hikers focus on the brand name or the waterproof label. I look at stress points instead. A boot can claim rugged construction and still fall apart at the places that matter most.
- Toe box and rand - The toe should have enough protection to handle scuffs without turning the upper into a thin layer of fabric.
- Flex points - The boot should bend smoothly where your foot bends. Sharp creasing usually means the upper will fatigue faster.
- Stitching and seams - Clean, tight stitching at load-bearing areas is a better sign than decorative panels with no structural purpose.
- Lace anchors - Metal eyelets, reinforced loops, and secure top hooks help the upper hold tension on steep climbs.
- Tongue design - A gusseted tongue, meaning it is attached farther down the sides, keeps debris and water from sneaking in.
- Heel structure - The heel counter should feel stable, not mushy, because a sloppy heel creates friction and blisters.
I also pay attention to weight. A heavy boot is not automatically more durable, and a light one is not automatically fragile. The real test is whether the extra material serves a purpose. In the U.S. market, you can usually find solid everyday hikers around the $120 to $220 range, while premium leather backpacking boots often move into the $250 to $400+ bracket. Price helps, but it does not replace inspection. Once the build passes that test, the last major question is whether the tradeoff fits your actual hiking style.
Where extra toughness pays off and where it gets in the way
There are trails where a rugged upper makes perfect sense, and there are trails where it is mostly dead weight. That is why I never recommend the heaviest build by default.
| Hiking scenario | What I would favor | Why |
|---|---|---|
| Hot, dry day hikes | Lighter synthetic or hybrid upper | Breathability and quicker drying usually matter more than bombproof abrasion resistance. |
| Muddy trails and brushy routes | Leather or reinforced hybrid | Repeated contact with wet vegetation and grit is hard on thin fabric uppers. |
| Rocky alpine terrain | Stronger leather or dense hybrid build | Scree, sharp stone, and constant edging punish soft materials quickly. |
| Backpacking with a heavier pack | More structured upper with solid toe and heel support | Once the load climbs, control and protection matter more than saving a few ounces. |
| Fastpacking and travel hikes | Light, well-reinforced synthetic | You want enough protection without sacrificing speed or all-day comfort. |
How to break them in and keep the upper alive
Break-in should be gradual, not heroic. I prefer to wear new boots at home for an hour or two, then use them on errands, then take them on two or three short hikes before trusting them on a full day. If a boot still creates hot spots after that, the issue is usually fit, not break-in.
- Start with short walks on flat ground so the upper can flex without punishment.
- Use the socks you plan to hike in, because sock thickness changes fit more than people expect.
- Check heel slip and toe room on descents; that is where a poor fit shows up fastest.
- Adjust lacing before the hike gets painful instead of waiting for blisters to form.
Maintenance matters just as much. Brush off mud and grit after each outing, let the boots dry at room temperature, and keep them away from radiators, campfires, or other direct heat. For leather, a light conditioner can help prevent cracking, but over-conditioning can soften support and attract dirt. For synthetics, clean the overlays and reapply water-repellent treatment when you notice water no longer beads on the surface. I also like to inspect the stitching and toe rand every few hikes, because small failures are much easier to fix early.
That kind of care is what keeps the upper performing after the rest of the shoe still looks fine. It also makes the next purchase easier, because you will know what actually wears out on your own trail days.
What I’d buy for the trails most people actually hike
If I were choosing today, I would start with the hike, not the hype. For maintained local trails and warm-weather travel, I’d pick a lighter synthetic or hybrid upper because comfort and drying speed matter more than armor. For rocky routes, shoulder-season trips, or any trek where brush and scree are part of the day, I’d move to leather or a sturdier hybrid.
When my pack gets heavier, I want more structure in the upper and better protection around the toe and sides. When the load is light and the mileage is fast, I would rather save weight and let the shoe breathe. That is the real decision behind sturdy uppers: buy enough protection for the abuse you expect, not so much that you end up carrying unnecessary bulk. If you want sturdy uppers, choose the boot that matches your terrain, pack weight, and tolerance for maintenance, because that is what usually separates a lasting trail partner from an expensive short-term fix.