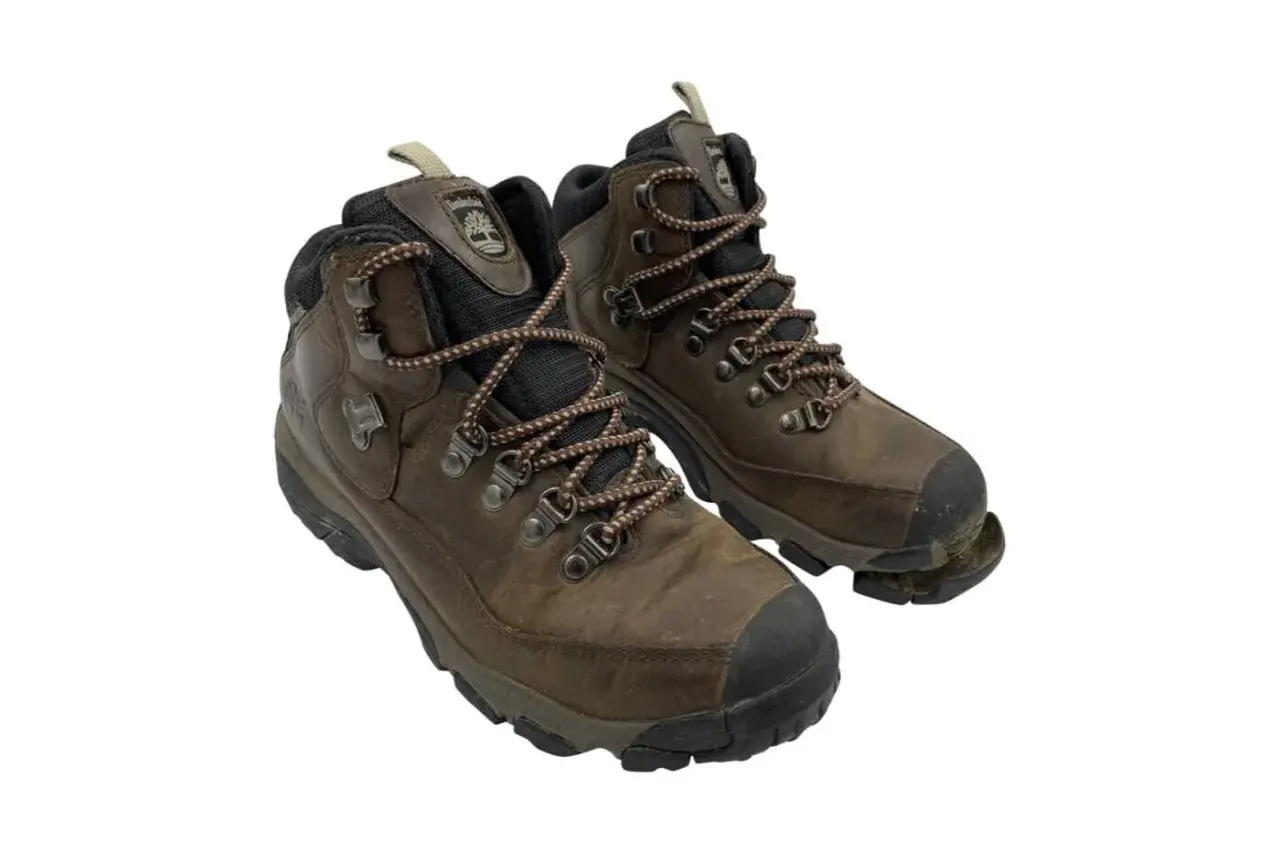
A hiking boot with a peeling outsole is more than a cosmetic issue. Once the bond starts to fail, the boot can twist differently, lose edge grip, and turn a normal day on the trail into an unstable walk back to the car. I’m going to break down why this happens, how I judge whether the boot is still worth saving, what I would do for a temporary repair, and when a cobbler is the smarter choice.
What matters most before you fix it
- A small lift at the toe or heel is often repairable. A full-length separation or crumbling midsole usually is not a quick home fix.
- Flexible repair adhesives work better than hard, brittle glues. A boot bends every step, so the repair has to move with it.
- DIY materials are inexpensive. A simple emergency repair usually stays under $20 in materials.
- Professional resoling is often worth it for a good boot. A straightforward resole commonly starts around $100, with more complex hiking-boot work running higher.
- Heat, moisture, age, and storage are the usual culprits. Polyurethane midsoles are especially vulnerable to long-term breakdown.
- Do not keep hiking on a half-detached sole. That is how a manageable repair turns into a ruined boot.
Why a hiking boot sole starts to peel
Most sole separation begins where the boot flexes the most: at the toe and forefoot. Hiking boots take repeated bending on ascents, hard braking on descents, and constant torsion on uneven ground, so the adhesive bond eventually becomes the weak link even if the tread still looks fine.
There are a few common reasons this shows up in hiking footwear:
- Adhesive fatigue - cemented boots rely heavily on glue, and that bond can weaken over time.
- Hydrolysis - polyurethane midsoles can break down during long storage, especially when boots sit unused for months in damp conditions.
- Heat damage - drying boots next to a heater, stove, or campfire can dry out leather and stress adhesives.
- Water, grit, and salt - mud and fine debris work into the bond line and keep the edge from staying clean and tight.
- Plain age - some boots fail because the upper is still fine but the foam and glue have simply reached the end of their life.
Construction matters too. A welted or stitchdown boot is usually more serviceable than a fully cemented one, but neither style is immune to failure. The practical question is not just why the sole is coming loose, but whether the rest of the boot is still healthy enough to justify repair. That is what I check next.
How I tell repairable damage from a lost cause
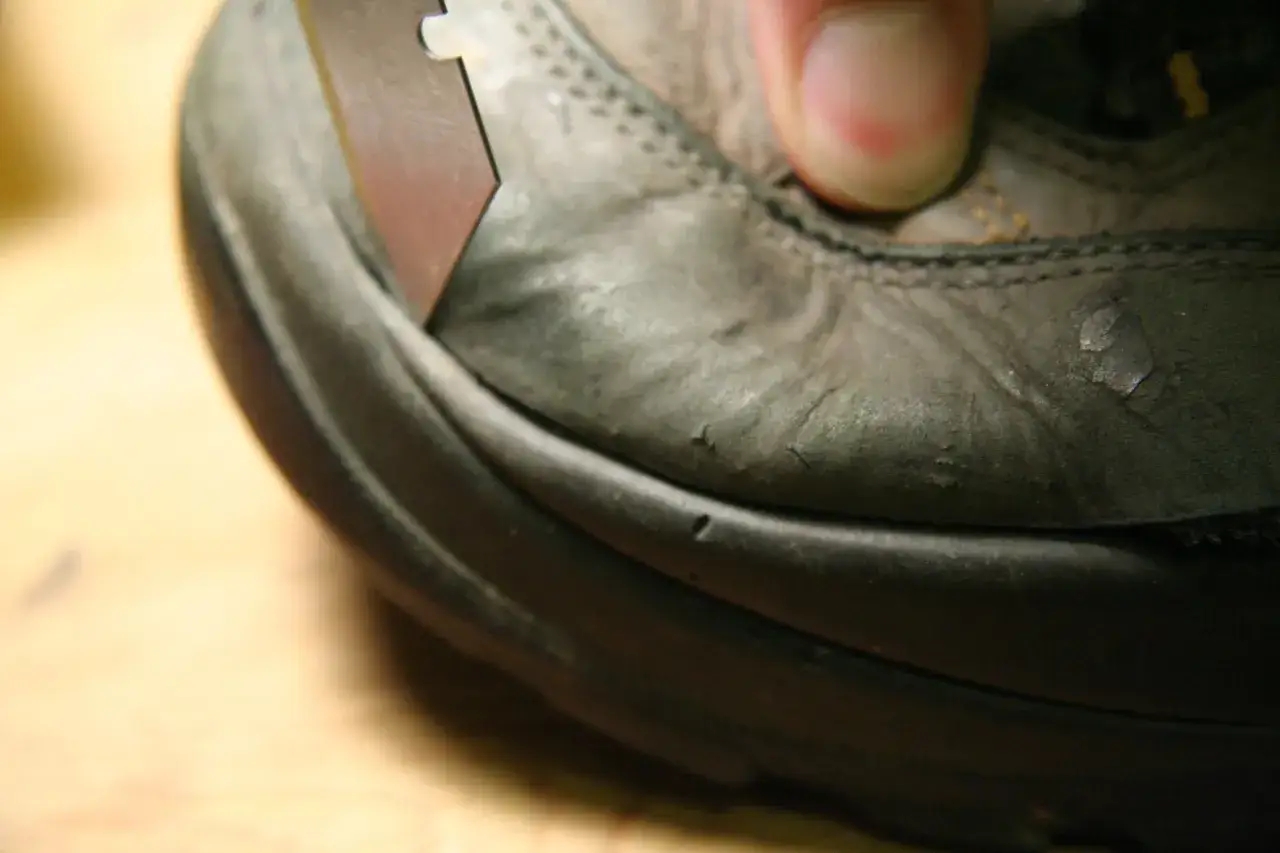
I inspect the boot in bright light, then flex it gently by hand. I want to see whether the problem is a small edge lift or a deeper structural failure. A tiny gap at the toe is very different from a midsole that has turned chalky and brittle.
| What I see | What it usually means | Best next move |
|---|---|---|
| Small lift at the toe or heel | Localized adhesive failure at the flex point | Clean, clamp, and do a temporary repair or send it for a resole |
| Separation along a longer section | The bond is failing beyond one small spot | Professional inspection is the safer bet |
| Crumbling or spongy midsole | Material breakdown, not just glue failure | Repair is less likely to hold; replacement becomes more realistic |
| Upper looks good, tread still has life | The boot may be a strong resole candidate | Worth comparing cobbler pricing with replacement cost |
| Rand split plus sole lift | More than one part of the boot is failing | Repair only if the boot is a high-value pair or has special fit value |
The biggest clue is usually the midsole. If the outsole peeled off but the foam beneath it still feels firm and uniform, I get more optimistic. If the foam is crumbling, shrinking, or cracking, I treat the boot as structurally tired rather than cosmetically damaged. Once I know which camp it falls into, the repair choice becomes much easier.
What I would do for a temporary home repair
For a small separation, I’m comfortable doing a stopgap repair at home. I would not trust it for a major backpacking trip, but it can buy time for a weekend hike or a walk to the trailhead. The key is to keep the repair small, clean, and flexible.
- Brush off all dirt and grit from the seam, the outsole edge, and the upper.
- Wash the area lightly if needed, then let the boot dry completely away from direct heat.
- Lightly roughen the bonding surfaces if they are smooth and glossy.
- Apply a flexible adhesive in a thin, even layer. I prefer repair products designed for footwear because they stay flexible after curing.
- Press the sole back into place, then clamp or tape it tightly so the seam does not drift.
- Leave it alone long enough to cure fully. A good rule is 24 to 72 hours, depending on the product and the weather.
I avoid brittle household glues here. A hiking boot flexes too much for a hard, glassy bond to last. Flexible urethane-based repair products are better suited to this kind of damage, and the material cost is usually modest enough that the whole fix stays under $20. If the sole keeps lifting after a proper clean-and-cure cycle, the problem is bigger than a patch.
When a cobbler or resole service is the better answer
There is a point where DIY repair stops being efficient and starts becoming false economy. If the boot still fits well, the upper is intact, and the sole unit is repairable, I would rather pay for a proper resole than gamble on repeated glue jobs. For many hikers, that keeps a well-broken-in boot alive for another season or two.
In the U.S., a straightforward resole often lands around $100. Hiking-boot-specific work can sit higher, with some services pricing in the $130 to $175 range depending on the model, sole, and amount of labor involved. More involved rebuilds cost more, and most shops will want to inspect the boot before giving a final estimate.
| Option | Best for | Typical cost | Typical turnaround | My take |
|---|---|---|---|---|
| DIY adhesive repair | Small, localized separation | Under $20 in materials | Same day plus curing time | Good emergency fix, not a forever solution |
| Cobbler resole | Healthy upper, failing outsole bond | About $100, sometimes $130 to $175 for hiking boots | Often 2 to 5 weeks | Best long-term choice when the boot fits well |
| Replace the boot | Crumbling midsole, major structural failure, or poor repair value | Cost of a new pair | Immediate if you buy in stock | Usually the right call when repair will not restore stability |
My rule of thumb is simple: if the repair quote is getting close to half the price of a comparable new boot, I start thinking hard about replacement unless the fit is exceptional. Fit is expensive to replace. If a boot already feels perfect on your feet, a resole can be money well spent.
How to keep the next pair from failing early
The best way to avoid another outsole problem is boring, regular care. That sounds less exciting than a miracle glue, but it works better. Boots usually fail early because they were stored badly, dried badly, or ignored until the bond had already gone.
- Clean off mud after each hike. Dirt holds moisture and grit at the seam.
- Air-dry boots in a ventilated room. Keep them away from direct heat and campfire-style drying.
- Remove the insoles and laces after wet trips. Moisture collects in hidden places.
- Store boots in a dry place with stable temperature. Hot garages, trunks, and damp sheds are bad for adhesives and foam.
- Condition leather when appropriate. Dry, cracked leather stresses the entire upper and can shorten the life of the bond.
- Inspect the edge of the sole every few outings. Catching a tiny lift early is much cheaper than waiting for a full peel.
If your boots use a polyurethane midsole, storage matters even more. Long periods of disuse in a damp environment can age the material from the inside out. On the trail, I also pay attention to the first sign of a flap or edge lift after a wet weekend, because that is usually the moment a small problem is trying to become a big one. The next section is where I turn that observation into a decision.
The decision I make before the next trail day
If the separation is small, the upper is still solid, and I only need the boot to survive a short window, I do a careful temporary repair and keep expectations low. If the boot is a good hiking model with a healthy upper and a resolvable construction, I send it to a cobbler before the damage spreads. If the midsole is crumbling or the boot has already lost its shape, I stop trying to rescue it.
That is the real test with a peeling hiking boot: not whether it can be glued once, but whether it can still support your feet safely over distance. A repair that keeps a boot alive but makes the next hike uncertain is not a good repair. The smartest move is the one that gets you back on the trail with stable footing, not the one that merely hides the failure for a few more miles.