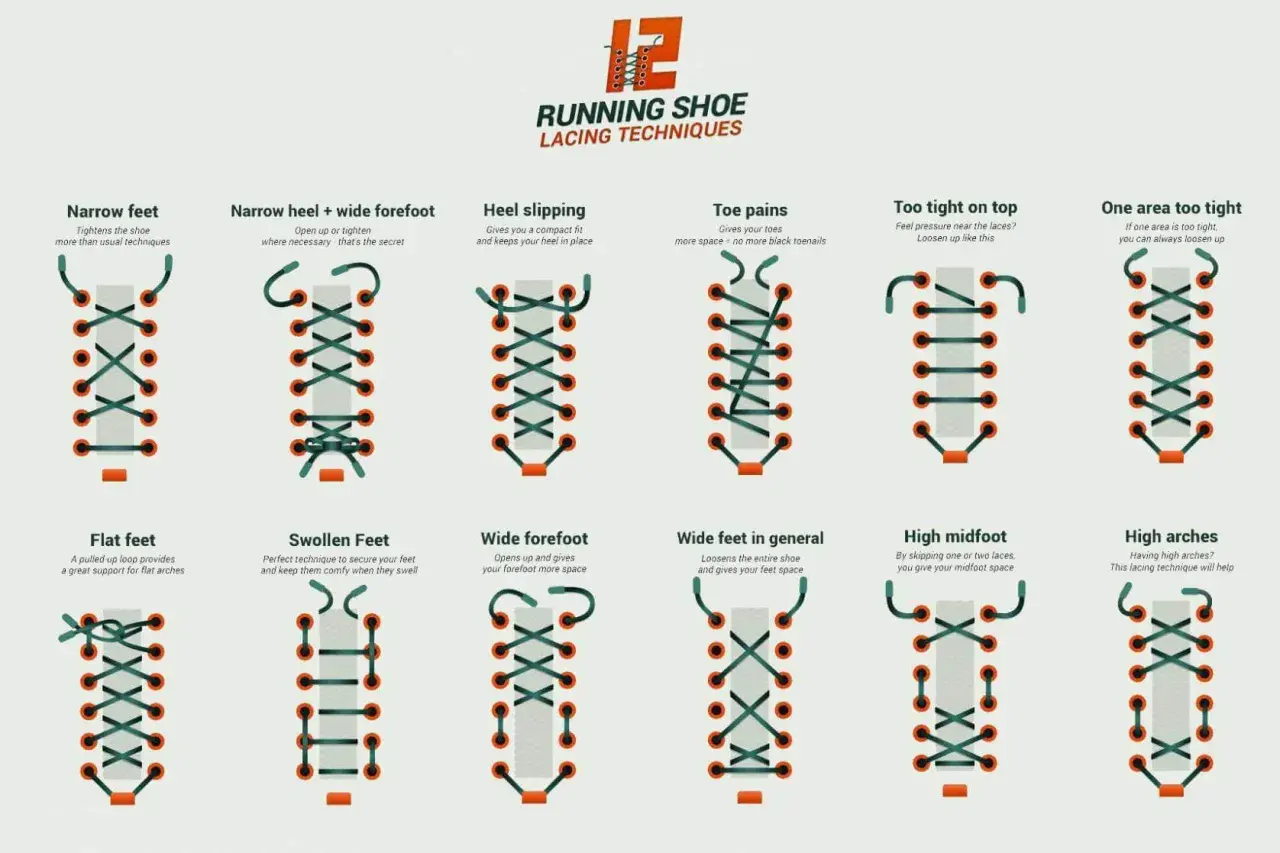
The fastest way to make hiking boots look cleaner without losing comfort
- Use criss-cross lacing as the base pattern; it is still the most forgiving starting point for most boots.
- Add a heel-lock or surgeon’s knot when your heel slips on climbs or descents.
- Switch to window lacing if the top of your foot feels pinched or irritated.
- Choose straight bar lacing when you want a cleaner visual line and a more deliberate look.
- Reserve ladder or lattice styles for boots with enough eyelets and a reason to prioritize appearance.
- Test any new pattern on a short walk before you trust it on a long hike.
What people are really asking for when they want boot lace patterns
I read this query as partly inspirational and partly practical. Most people are not hunting for a textbook definition of lacing; they want a boot that looks intentional and feels better than a plain factory tie. On hiking boots, that means the pattern has to do two jobs at once: improve fit where the foot actually moves and still look clean enough that the boot does not seem fussy.
That is why I separate boot lacing styles into two groups. The first group solves a problem, like heel slip or pressure on the top of the foot. The second group is mostly visual, which is fine as long as you understand the tradeoff. A pattern can look great in a photo and still be a poor choice for a wet, rocky climb. The real question is not just which pattern looks cool, but which one belongs on a boot you will wear all day.
That distinction matters, because the best-looking pattern on paper is often not the one that survives a long descent, a swollen foot, or a muddy trail. From here, I’d start with the patterns that earn their place first and look good second.
The patterns that actually earn a place on hiking boots
Some lacing styles are genuinely useful on trail footwear, while others are better saved for casual wear. I want the boot to stay secure, adjust easily, and still look tidy. That is why I usually think in terms of function first and style inside that frame, not the other way around.
| Pattern | What it looks like | Best use | Main tradeoff |
|---|---|---|---|
| Criss-cross | The familiar diagonal pattern most boots ship with | General hiking, quick adjustments, and most foot shapes | Not especially decorative, but very adaptable |
| Straight bar lacing | Clean horizontal bars across the outside of the boot | A neater look on visible boot shafts and leather hikers | Can take longer to adjust and is less forgiving than criss-cross |
| Heel lock | Not a decorative pattern so much as a lock at the top | Heel slip, steep climbs, and long descents | Helps stability, but it will not fix a badly sized boot |
| Window lacing | A visible “gap” or window around a pressure zone | Top-of-foot pressure, high insteps, and hot spots | Looks a little unusual until you get used to it |
| Ladder lacing | A rigid, woven look with strong vertical and horizontal lines | Tall boots and maximum lockdown | Very secure, but slower to lace and stiffer in feel |
| Lattice lacing | A more decorative woven pattern | Statement boots, short walks, and style-focused wear | Time-consuming and usually too fussy for hard hiking |
How I choose a pattern for fit, foot shape, and trail conditions
The smartest way to pick a pattern is to work backward from the problem. I ask myself where the boot fails first: heel, instep, toes, or ankle. Once you know that, the right method becomes obvious much faster than trying to force one “perfect” pattern on every boot.
- Heel slipping on climbs or descents - use a heel lock or runner’s loop near the top hooks. That extra lock matters more than adding tension everywhere else.
- Pressure on the top of the foot - use window lacing to create a relief zone. It is one of the few methods that can genuinely ease a hot spot without loosening the whole boot.
- A cleaner, more styled look - use straight bar lacing, especially on boots with enough eyelets or hooks to keep the bars even.
- Maximum support on a tall boot - use ladder lacing when you want the boot to feel firm and controlled, not loose and flexible.
- Easy adjustment during long days - stay with criss-cross plus a surgeon’s knot in the right place, because it is faster to retension when conditions change.
I also pay attention to the kind of hike. On a short scenic walk, a decorative pattern can be worth the effort. On a steep backpacking route, I care much more about whether I can retighten the boot with cold fingers, wet laces, or gloves on. If a pattern is hard to adjust, it is already less useful on the trail, even if it photographs beautifully.
In practice, I often mix methods instead of using one pattern from toe to collar. That flexibility is what makes boot lacing useful rather than cosmetic, and it connects directly to the part most people miss: making the final result look deliberate rather than improvised.
How to make the lacing look intentional instead of improvised
A neat boot pattern is mostly about consistency. The eye notices uneven spacing, lopsided tension, and sloppy lace ends long before it notices the actual technique. When I want the boot to look refined, I focus on small details that keep the whole upper visually balanced.
- Keep both boots mirrored. Even a stylish pattern looks messy if the left and right boot do not match.
- Balance the tension. Straight bar and ladder styles look best when each segment lies flat instead of bowing outward.
- Use the boot hardware, not against it. Hooks and eyelets should guide the pattern, not fight it.
- Choose lace thickness with intent. Chunky laces can make a pattern look bold, while slimmer laces look cleaner and more precise.
- Match the lace color to the purpose. Tonal laces make the boot look calm and polished; contrast laces make the pattern the point.
- Trim the excess effect, not just the excess lace. Long, dangling loops undo a clean pattern fast.
I like straight bar lacing for boots when I want a quieter, more finished look, especially on leather hikers and other boots with a visible shaft. It reads as deliberate rather than flashy. By contrast, lattice and ladder patterns announce themselves immediately, so they work best when the boot itself is part of the style. That is useful, but it also creates a temptation to prioritize looks too early, which is where many people go wrong.
The mistakes that turn a neat pattern into a problem
The most common mistake is trying to decorate a boot before the fit is under control. If the boot already slips at the heel or pinches at the instep, a more complicated pattern will not save it. It will just make the problem harder to diagnose.
- Over-tightening the whole boot. This often creates new pressure points instead of solving the original one.
- Using a decorative weave where a lock would do. Heel slip needs a heel-lock style solution, not a prettier criss-cross.
- Ignoring the flex point. The boot needs a different tension over the forefoot than it does at the ankle.
- Testing only on flat ground. A pattern that feels fine indoors can fail on the first climb or descent.
- Choosing a lace style that is hard to retie in bad weather. If it is awkward with gloves or rain, it will not stay practical for long.
- Running out of lace length. Some of the more decorative patterns use more lace than people expect, especially on taller boots.
I also think it is a mistake to assume one pattern will work the same way for every hike. Feet swell, terrain changes, and load weight changes how the boot behaves. A setup that feels perfect on a one-hour ridge walk might feel too loose on a full day with a pack. The better approach is to treat lacing as something you can tune, not something you set once and forget.
A trail-ready setup that balances style and support
If I were setting up one reliable boot configuration for most hiking days, I would keep the lower section simple, add a lock where the foot starts to move, and only get decorative above that if the boot still feels good. That gives you a pattern that looks intentional without sacrificing control.
- Start with criss-cross through the lower eyelets so the forefoot can flex naturally.
- Add a surgeon’s knot or heel lock at the point where the heel begins to lift.
- Use window lacing if the top of the foot feels crowded or sore.
- Switch to straight bar lacing on the visible upper section if you want a cleaner look.
- Save ladder or lattice styles for boots that are more about presentation than all-day abuse.
- Walk for 10 minutes, then retighten once before you commit to the trail.
That is the balance I trust: style where it helps, function where it matters most. The best boot lace pattern is not the one with the most twists or the most attention online; it is the one that keeps your heel seated, your instep calm, and the whole boot looking like you meant to wear it that way. If you start there, the “cool” part takes care of itself.