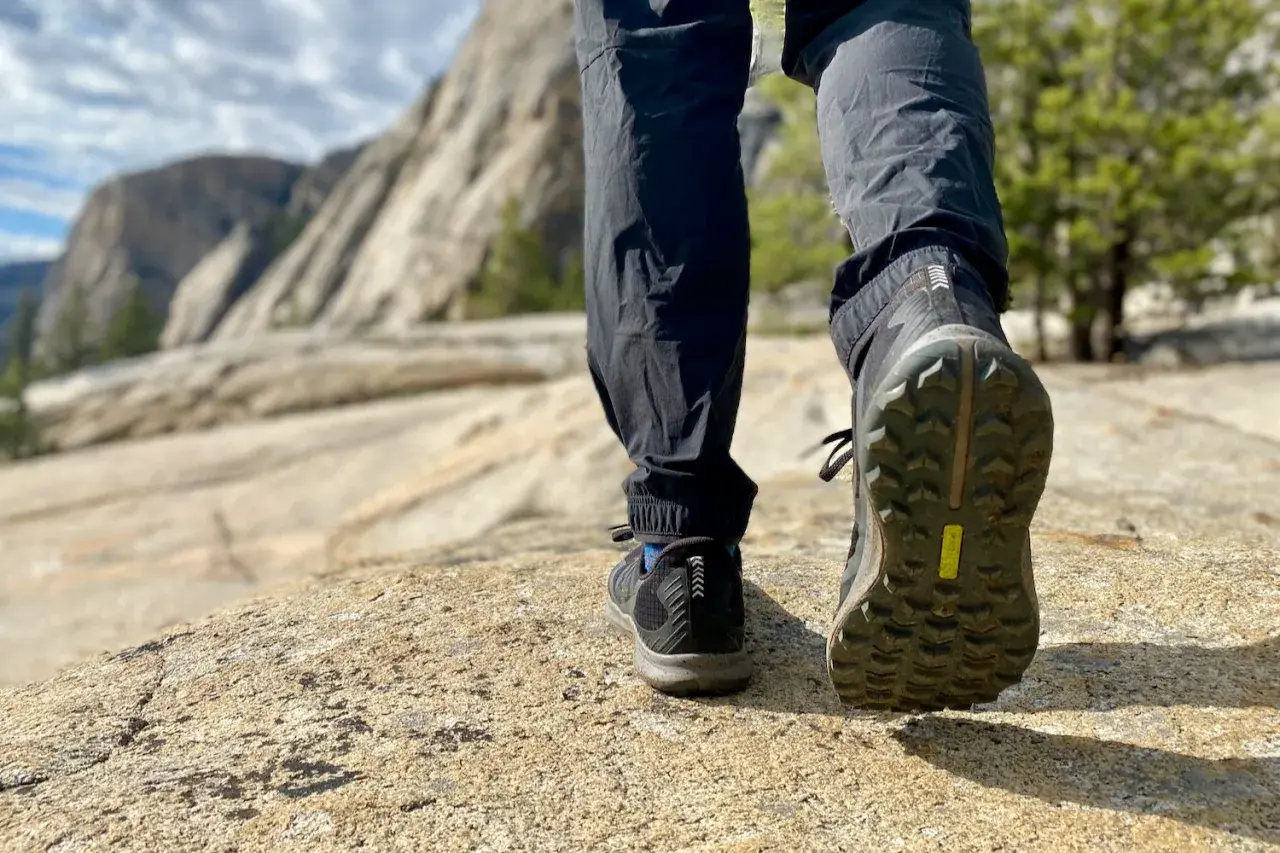
What matters most when a boot meets the ground
- Deeper, wider-spaced lugs usually grip better in mud, loose dirt, and soft ground.
- Shallower, tighter tread often feels calmer on hard-packed trail and wet rock.
- Directional braking zones help on descents, while multidirectional blocks help on mixed terrain.
- Softer rubber usually sticks better, while harder rubber usually lasts longer.
- The best outsole is the one matched to your most common trails, not the loudest marketing label.
What the tread is actually doing under your foot
Traction is not just about how deep the rubber looks. Lug height, lug spacing, lug shape, and the rubber compound all work together, and they do different jobs.
- Lug height is the amount of rubber standing off the outsole. More height usually means more bite in mud, loose dirt, and soft alpine ground.
- Lug spacing controls how easily mud and grit escape. Wider channels create a self-cleaning effect, meaning the sole sheds debris instead of packing it in.
- Lug shape decides whether the boot grips, brakes, or rolls. Angled edges help on descents; square edges increase surface contact on rock.
- Rubber compound changes stickiness and wear. Softer rubber tends to grip better; harder rubber tends to last longer.
- Heel brake is the more pronounced rear edge of the outsole that adds control on steep descents and helps limit sliding.
A good hiking boot balances those pieces instead of pushing one of them to the extreme. That is why a sole built for wet limestone or cobbles can feel very different from one designed for mud, scree, or shoulder-season snow. Once that logic is clear, the common tread styles are much easier to compare.
The main tread styles you'll see on hiking boots
When I look at outsoles in a shop, I group them by behavior rather than by brand language. The names change from one label to another, but the tradeoffs stay surprisingly consistent.
| Pattern type | What it looks like | Best for | Main tradeoff |
|---|---|---|---|
| Deep multidirectional lugs | Large, angular blocks with open spacing | Mud, loose dirt, scree, and mixed mountain terrain | Can feel clunky on pavement and hard rock |
| Directional braking lugs | Chevron-like or rear-facing edges with a stronger heel zone | Steep descents and loaded packs | Less useful on flat or sideways movement |
| Shallow, tight tread | Smaller blocks placed closer together | Hard-packed trails, travel days, wet stone, and urban approach hikes | Weaker in mud, snow, and soft soil |
| Hybrid all-terrain tread | Mixed lug sizes with moderate spacing | One boot for varied trips | Competent everywhere, exceptional nowhere |
| Mountaineering or winter tread | Pronounced lugs on a stiff, supportive platform with open channels | Snow, slush, and steep alpine use | Heavier and less comfortable on mellow trails |
For me, the most useful clue is the combination of shape and spacing. A boot can look aggressive but still skate on wet rock if the rubber is too hard or the lugs are packed too tightly. That is why two pairs with similar-looking tread can feel completely different on the trail. The next step is matching that behavior to the terrain you actually walk on.
Match the tread to the trail you actually hike
The same sole can be excellent in one setting and frustrating in another. If you hike mostly on packed forest paths, your priorities are different from someone crossing wet scree in the Alps or descending muddy ridgelines after rain.
| Trail condition | What to look for | Why it helps |
|---|---|---|
| Muddy forest trails and wet alpine grass | Deep, widely spaced lugs with a pronounced heel brake | The sole bites into soft ground and sheds mud instead of clogging |
| Wet rock or polished stone | Slightly shallower tread and a stickier compound | More rubber touching the surface reduces skating on slick rock |
| Loose scree, gravel, and broken trail | Angular multidirectional lugs | Edges catch shifting debris from more angles on both climbs and descents |
| Snow and slush | Deeper tread, open channels, and cold-ready rubber | The outsole is less likely to pack up and keeps better flexibility in cold conditions |
| Mixed road-to-trail approach days | Moderate lugs with a balanced center zone | The boot feels less harsh on pavement without giving up too much trail grip |
If I were packing for the Dolomites, the Picos de Europa, or a wet week in the Scottish Highlands, I would not chase the most aggressive mud sole I could find. I would want enough depth to handle mud and loose stone, but not so much bite that the boot feels clumsy on rock slabs or long approach walks. A balanced 4 mm-plus lug set often makes more sense than a pure mud-focused outsole.
How to read the fine print before you buy
Brand copy loves words like grip, traction, and all-terrain. I ignore the slogans first and look for the measurable details.
- Check lug depth. Roughly 3 mm sits on the lighter side, 4 to 5 mm is a strong all-purpose range, and 6 mm or more leans toward mud, snow, or mountain use.
- Check lug spacing. Wide channels help a sole stay clean; tight spacing can feel smoother on pavement and hard-packed trail.
- Check whether the pattern is directional. Chevron-style or rear-facing edges usually help braking downhill, while more even blocks help in multiple directions.
- Check the rubber feel. Softer compounds grip better, but they wear faster. Harder compounds save wear, but they can feel less secure on slick stone.
- Check the boot structure. A supportive midsole and a stable chassis let the tread work the way it was designed to. If the platform folds too easily, the pattern never gets a clean bite.
This is where many buyers get misled: they compare tread photos instead of real use cases. A boot that looks technical may still be the wrong choice if it is built for fast, light walking rather than loaded descents or mixed mountain terrain. Once you learn to read the spec sheet, wear and maintenance become the final piece of the puzzle.
When tread has reached the end of its life
Even a good outsole loses useful bite. The first signs are usually visual: rounded edges, flattened center lugs, and channels that stop clearing mud cleanly. If one side of the heel wears much faster, the boot may still be usable, but it has already lost some of the braking control that mattered on descents.
- Look for smooth, shiny rubber. That usually means the edges that used to grab are gone.
- Watch the heel brake. Once the heel zone flattens out, descending gets less controlled.
- Check for cracking or hardening. Rubber that ages out can feel slick even before it is visibly worn down.
- Clean the sole after muddy hikes. Packed grit acts like sandpaper and shortens the life of the pattern.
Resoling can extend the life of some boots, but not all of them. If the upper, midsole, and stitching are still in good shape, a resolable boot can be worth keeping in rotation. If the platform is collapsing or the rubber has hardened beyond comfort, replacement is usually the smarter move. From there, the only real question is which kind of outsole fits the trips you actually plan to take.
The outsole setup I would choose for a European hiking trip
For most trips, I would not pick the most aggressive mud sole. I would pick a balanced hiking outsole with moderately deep, multidirectional lugs, a clear heel brake, and rubber that is sticky enough for wet stone without feeling delicate. That gives you enough control for rocky climbs, damp forest paths, and the occasional sloppy descent without turning every hard surface into a clumsy walk.
- For mixed mountain days, choose a versatile tread with open channels and angular lugs.
- For lots of wet rock, favor slightly shallower tread and a stickier compound.
- For mud, snow, and late-season conditions, go deeper and more open, but expect more weight and less smoothness on pavement.
When I compare boot tread patterns, I start with the worst surface you expect to meet, not the easiest one. Do that, and the rest of the boot choice becomes much more straightforward.