Keeping hiking boots clean is not just about looks. It helps the materials breathe properly, keeps mud from grinding into seams, and gives waterproofing treatments a chance to work the way they should. This guide covers the full cleaning routine, what changes for leather, suede, nubuck, and synthetic uppers, and the drying and reproofing steps that actually extend a boot’s life.
The essentials for keeping hiking boots clean without damaging them
- Dry brush first. Loose grit should come off before any water touches the boot.
- Match the method to the material. Leather, suede, nubuck, and mesh do not tolerate the same treatment.
- Use gentle cleaners. Mild soap or a boot-specific cleaner is usually enough for everyday mud.
- Dry slowly at room temperature. Direct heat can crack leather, weaken adhesives, and warp shape.
- Clean the inside separately. Insoles and laces collect odor and grit even when the outside looks fine.
- Recondition only after cleaning. Leather care and waterproofing work best on clean, fully dry boots.
A pair of boots that comes back from a wet coastal walk or a muddy mountain trail usually does not need a rescue mission. It needs a method. I always start by looking at the upper material, because that one decision changes everything from the brush I use to whether I add conditioner later.
Start with the boot material, not the mud
One of the easiest ways to shorten the life of hiking footwear is to clean every pair as if it were the same. Leather, suede, nubuck, and synthetic uppers each react differently to water, friction, and soap. A boot can look clean and still be slowly damaged if the wrong cleaner strips oils or flattens the surface texture.
| Boot type | Best cleaning approach | What to avoid | Aftercare |
|---|---|---|---|
| Full-grain leather | Soft brush, damp cloth, mild cleaner or leather cleaner | Soaking, harsh detergent, high heat | Condition and re-waterproof after drying |
| Suede or nubuck | Suede brush, nubuck eraser, minimal water | Heavy soap, saturated brushing, polishing creams | Brush the nap back up when dry |
| Synthetic or mesh | Mild soap, soft brush, rinse well | Bleach, machine washing, aggressive scrubbing | Air dry fully; check seams and glue lines |
| Waterproof boots with a membrane | Clean the outer material gently, then dry completely | Heat drying and heavy residue from soap | Refresh the water-repellent finish when water stops beading |
That table sounds simple, but it matters. I see the most damage when people treat suede like rubber or leather like a kitchen sponge. If you are unsure, choose the gentlest route first: dry brushing, a small amount of water, and a cleaner made for footwear rather than an all-purpose household product. From there, the actual washing step is straightforward.
Remove grit before you add water
The cleaning sequence matters as much as the cleaner. If you add water too early, dirt turns into paste and gets pushed deeper into stitching, eyelets, and creases. I use the same order every time.
- Take out the laces and insoles.
- Tap the boots together gently to knock off loose mud.
- Use a soft brush to remove dry dirt from the upper, sole, seams, and rand.
- Wipe stubborn spots with a damp cloth or rinse briefly with clean water.
- Add a small amount of mild soap or boot cleaner if grime remains.
- Brush lightly, then rinse until no suds are left.
- Wipe off excess water with a clean cloth before drying.
The goal is not to scrub the boots spotless in one pass. It is to remove everything abrasive without wearing down the material. For a lightly dirty pair, this whole process can take under 10 minutes. A genuinely muddy pair may take closer to 20 minutes, especially if the tread and stitching are packed with grit.
If the mud is caked on, let it dry first and brush it off dry before using water. Wet clay smears, but dry clay can be lifted cleanly. That one habit saves a lot of unnecessary scrubbing.
Dry them slowly so they keep their shape
Drying is where many people make the mistake that costs them the most. Direct heat looks efficient, but it is hard on adhesives, leather fibers, and waterproof membranes. A boot dried too close to a radiator or in full sun can come out stiff, warped, or prematurely cracked.
What works better is slower and more controlled:
- Blot the outside with a towel.
- Loosen the laces and open the tongue so air can move through the boot.
- Stuff the inside with plain newspaper or a dry towel to draw out moisture.
- Replace the stuffing once it becomes damp.
- Leave the boots in a well-ventilated room at normal temperature.
For lightly damp boots, overnight drying is often enough. For soaked leather pairs, I plan on 24 to 48 hours, sometimes longer if the air is humid. That delay is worth it. A boot that dries evenly keeps its shape better and is less likely to develop odor or separated layers later.
I also avoid storing boots in a sealed bag while they are still damp. Even a little trapped moisture can create odor and make the next cleaning session harder than it should be. Once the outside is dry, the inside still needs attention.
Clean the inside, the laces, and the insole separately
The outside gets the attention, but the inside is where odor, sweat, and fine grit build up. If a pair smells off even after the uppers look clean, the problem is usually the insole, the tongue, or the lining around the heel cup.
I handle each piece on its own:
- Laces: wash in warm water with mild soap, then rinse and air dry flat.
- Insoles: wipe them with a damp cloth and a little mild soap; let them dry completely before putting them back.
- Interior lining: wipe gently with a cloth or soft brush, especially around the toe box and heel.
- Odor control: let the boot air out fully before reassembly so moisture does not get trapped again.
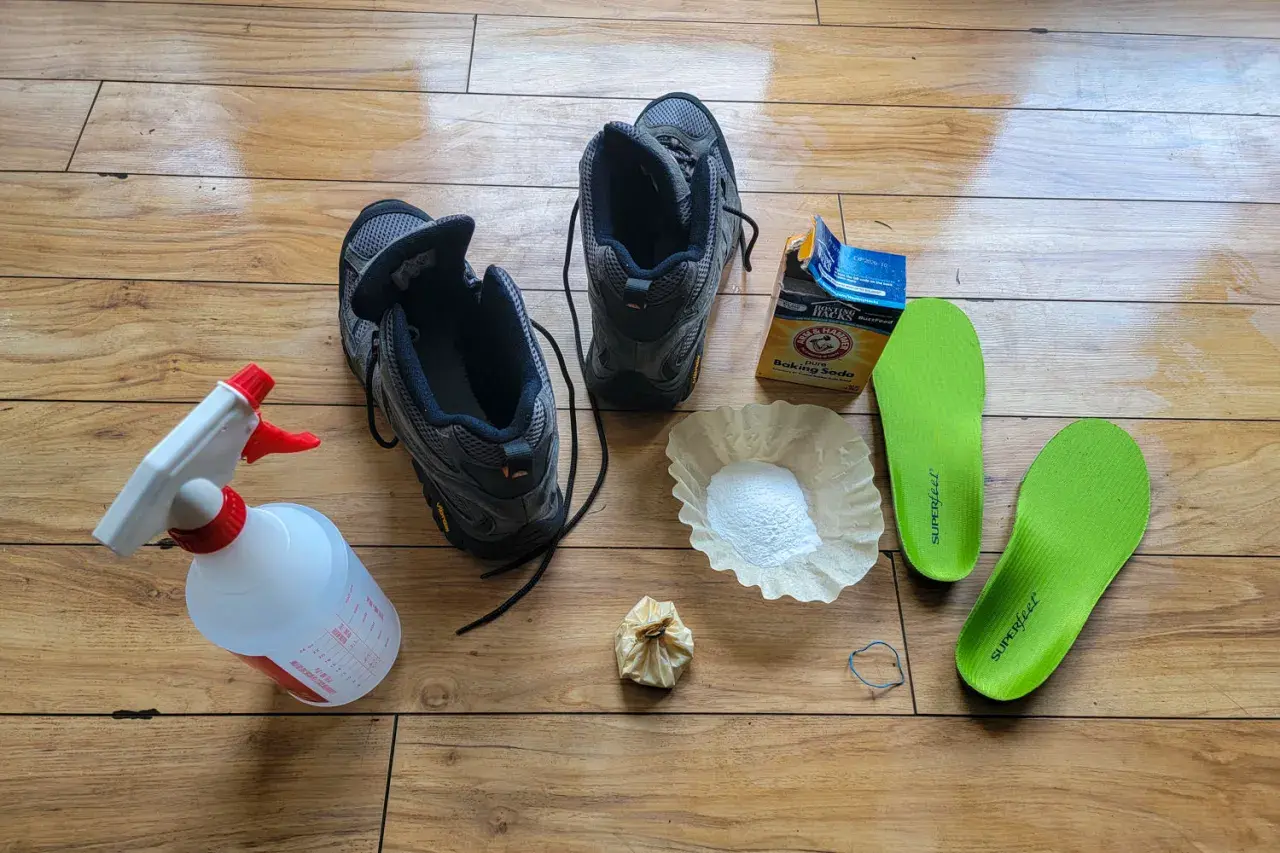
For stubborn odor, a light sprinkle of baking soda on the insole overnight can help, but I treat that as a support step, not a cure. If the lining is staying wet after every hike, the real issue is ventilation and drying speed, not fragrance or powder. Once the inside is clean and dry, the final care step depends on the upper material.
Recondition and re-waterproof only after the boots are fully clean
Clean boots and protected boots are related, but they are not the same thing. Waterproofing treatments, waxes, and conditioners work best when the surface is free of dirt and dry enough for the product to bond or absorb properly. If you apply them over grime, the treatment sits on top of the dirt instead of the boot.
Here is how I think about aftercare:
| Need | Best for | When to use it |
|---|---|---|
| Leather conditioner | Full-grain leather boots | After cleaning and full drying, when leather looks dry or stiff |
| Water-repellent treatment | Leather, suede, nubuck, and some synthetics | When water no longer beads on the surface |
| Brush restore | Suede and nubuck | After drying, to lift the nap and even out the finish |
Leather boots need the most judgment here. If they feel dry, rough, or slightly chalky after cleaning, a conditioner makes sense. If they still look supple, skip the extra product for now. Over-conditioning can make leather too soft for the kind of support hikers actually need. Synthetic and mesh boots usually need less conditioning and more focus on restoring water repellency and checking the seams.
This is also where I pay attention to the first clue that a boot needs care again: water stops beading and starts darkening the upper. That is the moment to reproof, not after the boot has already started to soak through on the trail.
Watch out for the mistakes that quietly ruin good boots
Most boot-care problems come from a few repeat mistakes, and they are easy to avoid once you know what to look for. I would rather see someone clean boots a little less aggressively than clean them with the wrong method and regret it later.
- Machine washing: it can damage glue, stitching, shape, and waterproof construction.
- High heat: it dries materials too fast and can cause cracking or separation.
- Heavy detergents or bleach: they can strip protective finishes and dry out leather.
- Scrubbing suede like canvas: it flattens the texture and can leave permanent marks.
- Skipping the dry brush step: it turns grit into abrasive sludge.
- Reproofing too soon: product goes on top of moisture or residue and performs poorly.
There is a pattern behind all of these: people rush the process. A boot that gets 10 minutes of careful cleaning and a full day of drying usually lasts longer than one that gets a hard scrub and a heat blast in half the time. That gap matters even more if you hike often or carry heavier loads.
The small habits that keep the next cleanup easy
The easiest boots to clean are the ones that never get neglected for weeks. After a hike, I knock off loose dirt while it is still dry, open the boots so they can vent, and let them air out before they ever go back on a shelf. That alone cuts down on odor, stains, and mud that hardens into seams.
If you want less work next time, keep a few habits in place: clean the boots the same day after a wet hike, store them somewhere dry and ventilated, and reapply protection before the upper starts looking tired. For leather pairs, that means conditioner and water resistance as needed. For suede, nubuck, and synthetics, it usually means gentle cleaning and a fresh water-repellent finish when the old one stops performing.That is the real answer to keeping hiking boots trail-ready: clean them gently, dry them properly, and treat the material you actually have, not the one you wish you had.