Grip is usually a mix of outsole rubber, lug shape, trail condition, and how well the shoe holds your foot. If you are trying to figure out how to make shoes more grippy, the honest answer is that a little maintenance helps, the right traction aid helps more, and the wrong shoe can still be the limiting factor. This guide breaks down the fixes that actually matter on hiking trails, from muddy forest paths to slick coastal rock and icy shoulder-season routes.
The fastest traction gains come from clean soles, better rubber, and the right add-on for the terrain
- Clean the outsole first; packed mud and small stones steal traction fast.
- Deep lugs help on dirt and mud, while sticky rubber matters more on wet rock.
- Microspikes are the right answer for packed snow and ice, not for pavement or mud.
- Worn-out soles need replacement or resoling; no trick will bring back lost tread.
- Fit matters too, because heel lift can feel like bad traction even when the outsole is fine.
What actually makes hiking shoes feel grippier
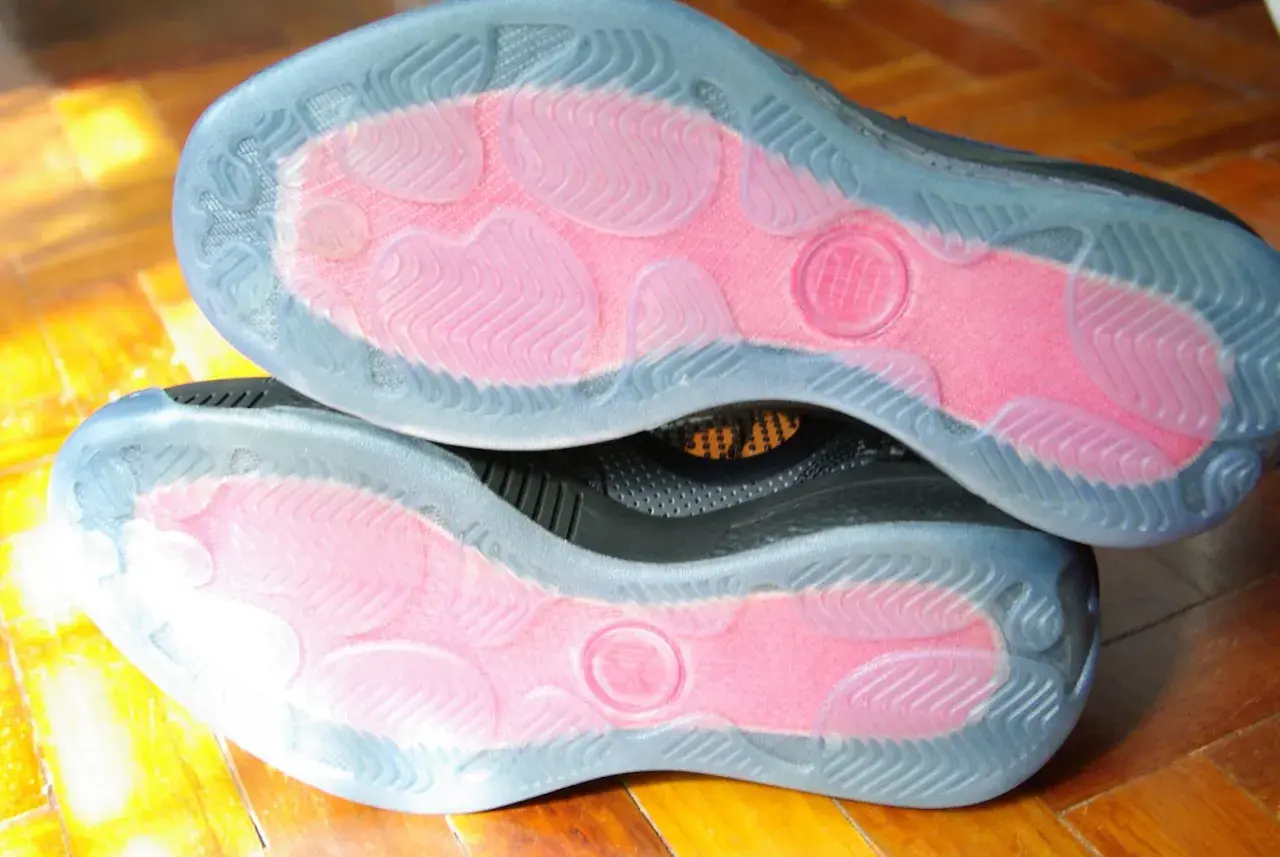
I think about trail traction as a system, not a single feature. The outsole compound creates friction, the lugs create bite, and the spaces between those lugs help the sole clear mud instead of packing up into one smooth slab. If the shoe is worn smooth or your foot is moving around inside it, every step feels less secure even when the tread still looks usable.
- Rubber compound controls how well the sole clings to wet rock, wood, and stone.
- Lug depth matters most on soft ground, loose dirt, and gravel.
- Lug spacing helps the sole self-clean in clay and mud.
- Fit and lockdown reduce internal movement, which often gets mistaken for poor traction.
Fit deserves more credit than it gets. If your heel lifts, your arch floats, or your foot slides forward on descents, the outsole is trying to do its job while the rest of the shoe is betraying it. A heel-lock lacing pattern can help in that situation, and it costs nothing, which is why I always check it before I start shopping for a new pair. Once those basics are clear, the cheapest traction upgrade is simple cleaning.
Clean the outsole before you blame the shoe
Dirty tread is fake traction. Mud fills the voids between lugs, pebbles wedge into the outsole, and a shoe that should bite into the trail starts behaving like a smooth board. REI’s cleaning advice is basically to remove the gunk that blocks the tread, and that is exactly how I treat it after a muddy hike.
- Let the outsoles dry enough that the mud breaks loose instead of smearing.
- Brush the lugs hard with a stiff brush, paying attention to the heel and toe.
- Rinse stubborn clay from the outsole only if brushing does not clear it.
- Pick out stones and packed grit from the lug channels.
- Dry the shoes fully before storing them so grit does not stay embedded in damp rubber.
I would avoid solvents, petroleum products, and harsh detergents unless the manufacturer specifically recommends them. They can age the rubber or leave residue that changes how the sole behaves. If the outsole is clean and the shoe still slips, then the real answer is probably not another cleaning pass but a different kind of traction solution.
Choose the right traction aid for the trail
There is a hard line here: a grippier hiking shoe helps on wet dirt, roots, and rock, but winter traction devices solve a different problem. At REI, winter traction devices currently span roughly $20 to $200, and Kahtoola MICROspikes are listed at $83.95, which is a realistic middle-of-the-road price for hikers who actually see ice.
| Terrain | Best option | Why it helps | Typical cost | Main limitation |
|---|---|---|---|---|
| Muddy forest trails | Deep-lug hiking shoes or boots | Lugs bite into soft ground and shed mud more effectively | $120 to $220 for a new pair | Not a fix for ice or polished stone |
| Wet rock and slick roots | Sticky-rubber hiking or approach shoes | Better rubber adhesion matters more than aggressive tread alone | $120 to $220 for a new pair | Still limited on very smooth, wet slabs |
| Packed snow and icy descents | Microspikes or similar traction devices | Metal teeth bite into frozen surfaces in a way rubber cannot | About $50 to $100+ | Not meant for asphalt, concrete, or mud |
| Steep, technical ice | Crampons with compatible boots | More aggressive points give much better hold on hard ice | About $100 to $200+ | Requires the right footwear and more skill |
REI notes that microspikes are intended for winter conditions and are not recommended for hard surfaces like asphalt or concrete. That matters because the wrong traction aid can feel awkward, wear out early, and still leave you underprepared when the trail turns icy. My rule is simple: if the route only has a few frozen patches, bring the traction device anyway, because the weight penalty is small compared with the cost of a fall.
Buy for grip when the shoe itself is the bottleneck
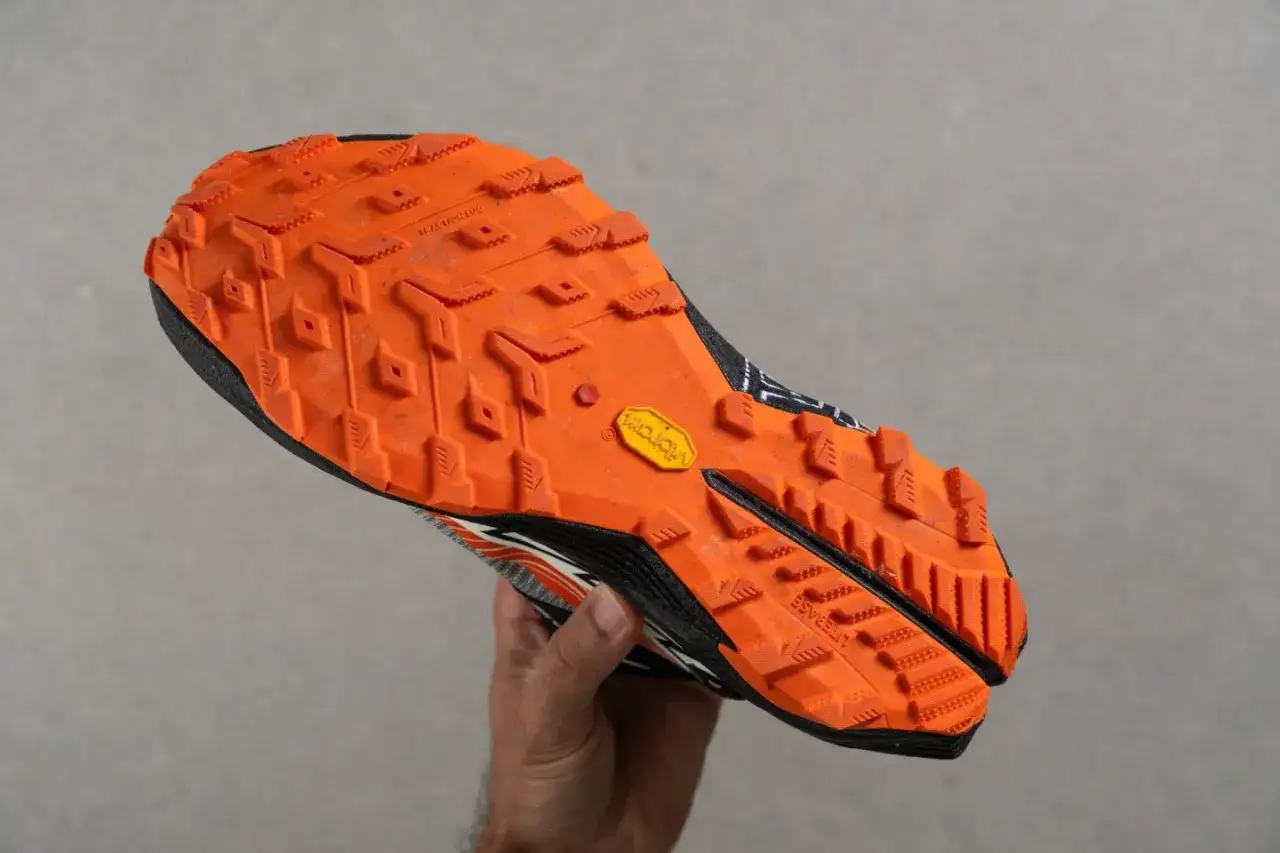
If you are replacing footwear, I look for three things before I look at color or weight: rubber compound, lug geometry, and how much structure the upper gives the foot. Vibram says its Megagrip compound is designed for both wet and dry terrain, and that is exactly the kind of all-round traction many hikers want for mixed conditions.
- Deep, thick lugs help on dirt, mud, and loose gravel.
- Wider lug spacing keeps clay from packing into the outsole.
- Sticky rubber is the part that matters on wet rock, boards, and polished stone.
- A climbing zone at the toe helps when you smear on rock instead of sinking into soil.
- Resoleable construction is worth paying for if the upper is still good but the outsole is tired.
A climbing zone is the flatter section near the front of the sole that gives you a more precise feel on rock. It is useful on scrambly approaches and mountain paths, but it does not replace real lugs on soft ground. That is the pattern I keep seeing: the best hiking shoe for grip is usually not the one with the deepest tread everywhere, but the one whose rubber and lug design match the terrain you actually walk.
If the outsole is rounded smooth, the lugs are shallow, or the shoe has started to separate at the forefoot, no spray or gadget will restore what the rubber has already lost. In that case, resoling makes sense only if the upper and midsole are still healthy; otherwise, replacement is the honest fix. That leads straight into the shortcuts I would skip.
Skip the shortcuts that damage grip
I am skeptical of fixes that promise a miracle without respecting the trail. Sprays, waxes, and improvised coatings often make a sole behave unpredictably, which is not the same thing as real traction. On a hike, unpredictability is usually worse than average grip.
- Do not use microspikes on asphalt or concrete; they wear the device and make the walk awkward.
- Do not expect a household spray to outperform proper rubber and tread design on wet rock.
- Do not carve up the outsole aggressively unless a cobbler has a specific repair plan.
- Do not ignore heel slip inside the shoe, because internal movement can mimic poor outsole grip.
If a shoe feels slippery because it is badly fitted, no amount of outsole tweaking will fully fix it. A secure heel, the right sock thickness, and a lacing pattern that locks the foot in place can make a larger difference than people expect. Once those basics are handled, the smartest move is to build a setup that works across the kind of hiking you actually do.
The setup I would trust on a mixed-season hike
For the kind of hiking most people do in the U.S., I would keep it simple: a well-fitted shoe with deep lugs for dirt, sticky rubber if I expect wet stone, and a pair of microspikes in the pack whenever temperatures can drop and freeze the trail overnight. That combination covers more real-world conditions than chasing one mythical outsole that does everything.
- Warm, dry trails: clean deep-lug hiking shoes are usually enough.
- Wet rock and roots: prioritize sticky rubber and a locked-in heel.
- Frozen or packed-snow trails: carry traction devices instead of hoping the outsole will save you.
- Worn footwear: resole or replace before trying another workaround.
The practical version of traction is not complicated: match the sole to the ground, keep the tread clear, and add traction hardware only when the trail genuinely calls for it. If you do those three things well, your shoes will feel noticeably more secure without turning your kit into a project.