Hiking boots fail in predictable ways, and cracked soles are rarely random. In practice, the damage usually comes from a mix of material aging, repeated flexing, heat, moisture, and poor storage between trips. I’m going to break down the main causes, the signs that matter on the trail, and the fixes that actually buy you more time.
The short version for hikers
- Cracks usually come from a mix of age, repeated flexing, heat, and poor storage, not from one single hike.
- Polyurethane midsoles are a common weak point because they can hydrolyze and turn brittle over time.
- Rubber outsoles usually wear down before they crack, but heat, UV, and bad storage speed up failure.
- Fine surface lines are not always dangerous; open splits, crumbly foam, and sole separation are.
- Slow air-drying, cool storage, and basic cleaning do more than most “protective” gimmicks.
The real reasons hiking soles crack
When I inspect a cracked hiking boot, I start with stress and chemistry, not mileage alone. Every step bends the forefoot, compresses the heel, and twists the midsole slightly. Over time, that flex fatigue can turn small surface lines into real splits, especially on boots that spend months in a hot car, a damp garage, or a closet between trips.
Repeated flexing wears the sole from the inside out
Trail walking is harder on footwear than a casual stroll on pavement because hiking adds side-hilling, toe-off torque, and uneven landings. A boot may look fine from above while the sole unit is slowly losing elasticity at its bend points. I usually see the first cracks near the ball of the foot or the heel edge, where flex is constant.
Heat and moisture speed up aging
Heat makes rubber and foam age faster, while moisture can break down certain sole compounds over time. A boot that is wet, then dried aggressively, then stored in a warm place is under more strain than one that is cleaned and dried slowly. That is why summer car storage and campfire drying do so much damage.
Read Also: How to Dry Hiking Boots Safely - Avoid Damage!
Adhesives fail before the tread looks “worn out”
Many hikers assume the outsole itself cracked first, but often the bond between layers is the weak point. Once glue starts to fail, the sole can lift, gap, or split at the edges even if the tread still has life left. That is one reason older boots can feel suddenly unreliable after seeming fine for weeks.
That leads to the next question I always ask: which part of the boot is actually failing, and what does that tell you about repairability?
Which boot materials crack first
The material mix matters more than most shoppers realize. A hiking boot with a tough rubber outsole and a polyurethane midsole ages differently from one built around EVA foam or a stitched leather rand. If you know what the boot is made of, you can predict whether you are looking at cosmetic wear or structural failure.
| Material | How it usually fails | What it looks like | What it means for hikers |
|---|---|---|---|
| Rubber outsole | Hardens, loses grip, then cracks at flex points | Shallow surface checking, worn lugs, edge splits | Often still repairable if the rest of the boot is sound |
| EVA midsole | Compresses and tears rather than truly “rotting” | Dented foam, loss of bounce, split cushioning | Comfort and stability drop quickly; replacement is common |
| Polyurethane midsole | Hydrolyzes and becomes brittle over time | Small cracks, crumbly edges, separation near the sole unit | Often a serious age-related failure in older hiking boots |
| Leather upper or rand | Dries out and checks at bend lines | Fine creases, then open splits in the leather | Can sometimes be slowed with proper conditioning |
| Adhesive bond | Breaks down from heat, age, and wet-dry cycles | Sole lifting at toe or heel | May be a cobbler fix if the sole itself is still healthy |
My rule is simple: if the midsole is turning brittle, the boot is aging structurally; if only the rubber lugs are worn smooth, you may still have a serviceable boot. That distinction matters before you decide whether a crack is harmless or a sign the boot is done.
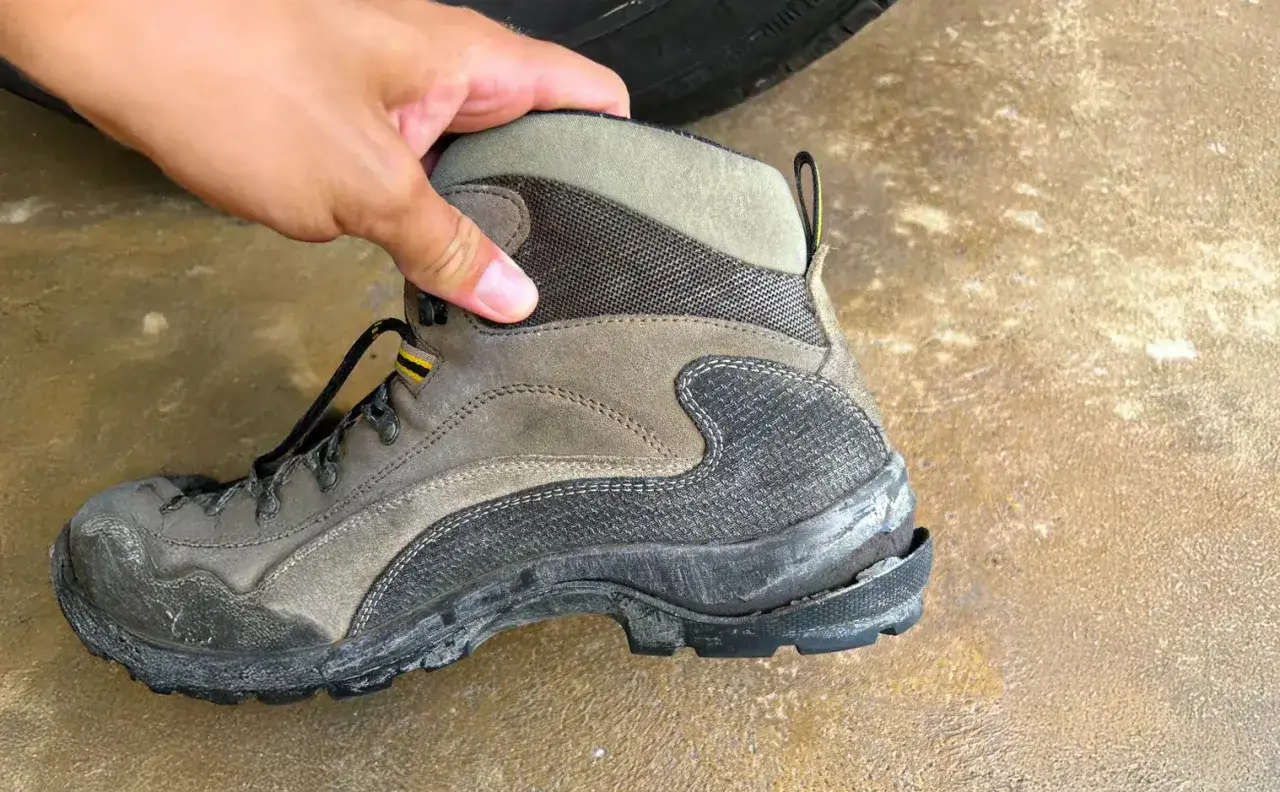
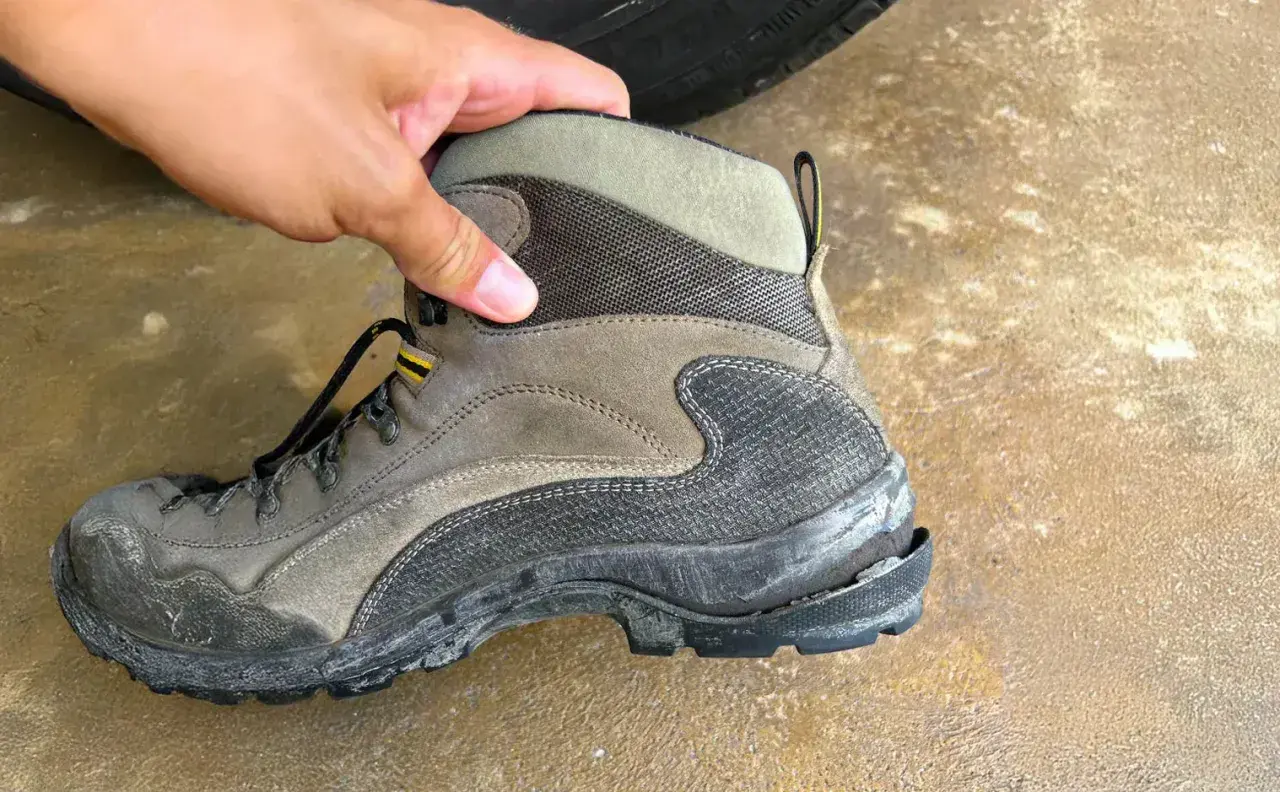
How to tell a harmless crack from a boot that needs replacing
Not every line in a sole means disaster. I separate cosmetic wear from real failure by looking at depth, location, and how the boot behaves when bent. A boot can have scuffed tread and still be fine, while another can look clean on the outside and be one long hike away from separation.
| What you see | Usually cosmetic | Usually serious |
|---|---|---|
| Fine surface lines in the tread | Yes, if the rubber still feels flexible | No, not by itself |
| A crack that opens wide when you bend the boot | No | Yes, especially if you can see foam underneath |
| Outsole lifting at the toe or heel | Rarely | Yes, though it may still be repairable |
| Foam that crumbles when pressed | No | Yes, that is usually structural breakdown |
| One boot failing much earlier than the other | Sometimes | Often a fit, gait, or storage issue that needs attention |
When I check a boot in hand, I gently flex the forefoot and heel. If the crack opens like a seam, if the sole feels spongy in one area and chalky in another, or if the boot twists unevenly, I treat it as a real failure. That matters because the next step is not cosmetic care anymore; it is damage control.
What makes the problem worse on hiking trips
Trail conditions can accelerate cracking faster than people expect. Water, mud, road salt, campfire heat, and long storage gaps all matter. I see a lot of boots fail after a season of hard use followed by six months untouched in a warm room.
- Heat sources dry and distort the sole unit, especially when boots are placed too close to a stove, radiator, or heater.
- Long storage is tough on polyurethane midsoles and other foam-heavy constructions, especially in humid or poorly ventilated spaces.
- Wet-dry cycling stresses glue lines and leather, which can lead to separation and flex cracks.
- Salt and grit act like sandpaper on the outsole edges and can also pull moisture away from leather uppers.
- Heavy torsion on rocky descents twists the boot more than flat walking ever will.
REI’s boot-care advice is straightforward: air-dry boots and keep them away from heat sources. Danner’s guidance for full-grain leather points in the same direction: condition leather so it does not dry out and crack. Those habits sound basic, but they are exactly what keeps a boot from aging faster than the trail should allow.
Once you know what is hurting the boot, the practical question becomes how to slow the damage down before it turns into a repair bill.
How to slow cracking and get more miles from your boots
The best prevention is boring, but it works. After a hike, brush off grit, rinse off salt, and let the boots dry naturally. If the upper is leather, recondition it only after it is clean and fully dry; if the boot is synthetic, skip heavy products that just trap dirt. I also store hiking boots in a cool, ventilated place rather than a hot garage or sealed plastic bin.
- Remove mud and grit before they get pushed into flex points.
- Air-dry at room temperature instead of using direct heat.
- Condition leather only when it actually looks dry, not on a fixed schedule.
- Keep boots out of direct sun and away from hot cars, radiators, and campfires.
- Wear stored boots occasionally if they use polyurethane-heavy components.
This routine will not revive a midsole that has already hydrolyzed, but it can keep a healthy pair from aging early. That is why prevention is worth more than repair products once the cracking is already visible.
When repair is worth it and when replacement is smarter
Repair makes sense when the upper is sound and the failure is limited to the sole unit. A good cobbler can often resole or re-bond a boot with a detached outsole, but crumbling polyurethane is another story because the material itself has already broken down.
| Situation | Best move | Why |
|---|---|---|
| Outsole is worn flat but the midsole is intact | Resole | The boot still has a healthy foundation |
| Sole is lifting, but the foam underneath is still firm | Re-bond or resole | The upper can often be saved if the base materials are sound |
| Midsole is crumbly or cracked through | Replace | The structural material has already failed |
| Leather upper is split and the sole is separating | Usually replace | Repair cost can exceed the value of the boot |
If you hike often and want the most mileage per dollar, I’d favor boots that are built to be repaired rather than thrown away. That choice matters even more if you only use them for seasonal trips, because long idle periods are hard on some sole compounds.
What I would check before buying the next pair
Before I buy the next pair, I check three things: the sole construction, the midsole material, and whether the brand supports repair or resoling. I also think about my own habits, because a boot that lives in a cool closet and sees weekly use is not aging under the same conditions as one that spends most of the year in storage.
- Construction matters: stitched or rebuildable boots usually outlast fully bonded ones in real-world use.
- Midsole material matters: ask whether the boot uses EVA, PU, or a mixed system.
- Storage reality matters: if your boots sit unused for months, favor materials that tolerate that better.
- Terrain fit matters: rocky descents, wet coastal paths, and steep alpine routes punish soles differently.
- Serviceability matters: a boot you can resole is often the smarter long-term buy.
The practical takeaway is simple: cracking is usually a material-and-storage problem first, a trail problem second. If you match the boot to your terrain, keep it clean and dry, and avoid baking it between adventures, you can delay the failure point by a lot more than most hikers expect.