A tour du Mont Blanc self-guided trek is less about navigation and more about making smart choices before you ever step onto the trail. This article breaks down how long the loop really takes, what level of fitness it demands, when to go, how to book lodging, and how to budget for a crossing of France, Italy, and Switzerland. I’m also focusing on the practical details that decide whether the trip feels smooth or unnecessarily hard.
The route is straightforward to follow, but the logistics are not
- The classic circuit is about 170 km (105 miles) and is usually completed in 7 to 10 days.
- Self-guided means you handle your own reservations, pace, and route choices, even if the trail itself is well marked.
- The best hiking window is usually mid-June to late September, but access still depends on snow and weather.
- Shared shuttles from Geneva often cost about €30 to €40 per person, while private transfers usually start around €150.
- For a first attempt, I would prioritize lodging, weather margin, and stage length over chasing the shortest itinerary.
What a self-guided trek around Mont Blanc really involves
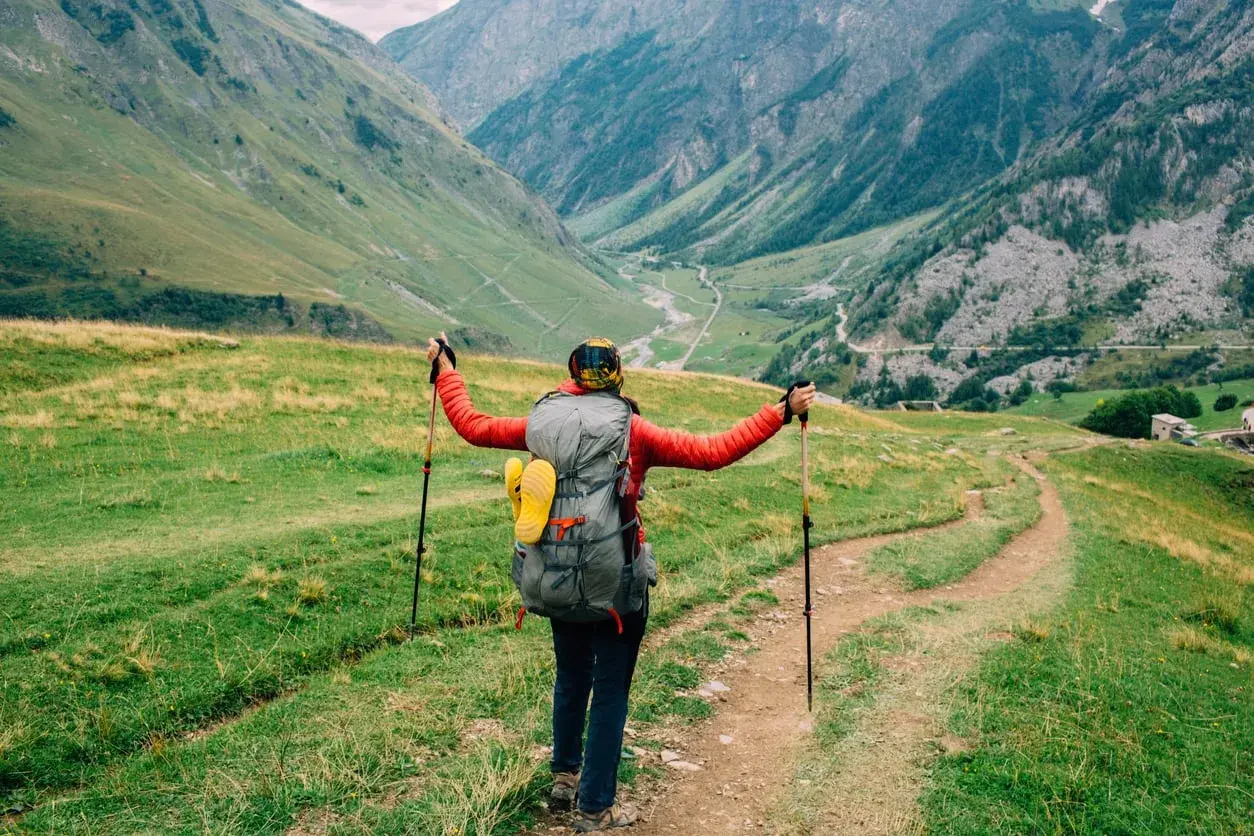
The Tour du Mont Blanc is a classic high-alpine circuit that loops around the Mont Blanc massif through France, Italy, and Switzerland. The route is famous because it offers a lot of variety in a relatively compact area: mountain passes, valley villages, refuges, lakes, meadows, and constant views of the massif itself. On paper, it looks simple. In practice, it asks for steady endurance, good planning, and a realistic attitude about weather.
Most hikers do not struggle because the path disappears. They struggle because the days are long, the climbs add up, and the accommodation network has to be matched carefully to the route. Self-guided means I am responsible for the stage plan, the bookings, the timing, and the backup options if the weather turns. That is very different from a guided trip, where someone else absorbs most of the logistics.
The route is best suited to hikers who are comfortable with consecutive mountain days, not just one big outing. If you already know how your body reacts to descents, heat, rain, and a pack on tired legs, you are in the right category. If not, the trail can still work, but only if you give yourself more days and more margin. That brings me to the biggest planning choice of all: how ambitious the itinerary should be.
Choosing the right itinerary length and direction
The official route pages describe the classic circuit as more than 170 km (105 miles), usually finished in about 7 to 10 days. For context, the Chamonix Tourist Office lists one 6-day light-pack variant at about 80 km (50 miles), with roughly 5,500 m (18,000 ft) of ascent and 6,000 m (19,700 ft) of descent. That number tells you something important: even a shortened version is still a serious mountain trek.
| Itinerary length | Typical daily effort | Best for | My take |
|---|---|---|---|
| 6 days | About 5 to 7 hours a day, often with 700 to 1,300 m of climbing | Very fit hikers with limited time | Efficient, but not forgiving if the weather slips or your pace is slower than expected |
| 7 to 8 days | Moderate to hard days with a better balance between effort and recovery | Most first-time self-guided hikers | This is the sweet spot if you want a full experience without making every day a race |
| 9 to 10 days | Shorter stages, more time to stop, more room for weather changes | Hikers who prefer comfort and flexibility | Best if you care about the views as much as the mileage |
For a first self-guided attempt, I usually prefer the classic anti-clockwise flow starting from the Chamonix or Les Houches side. It matches the standard stage network and tends to be easier to plan around than inventing a custom direction. Clockwise can work, but I would only choose it if the lodging calendar or transport setup makes more sense that way.
If you are debating between speed and comfort, I would lean toward comfort almost every time. A trek like this is much better when you have enough energy left to enjoy the high passes instead of just surviving them. Once the stage length is clear, the next constraint becomes accommodation, because the route only works if the right beds are open when you need them.
Booking huts and lodgings without making the trek harder than it needs to be
The lodging network around Mont Blanc is one of the reasons this trek works so well on your own. The trail’s booking platform now lists 43 establishments along the route, ranging from simple mountain refuges to lodges and hotel-style rooms. That gives you options, but it does not remove the need to book early, especially if you want a private room or a specific stage-to-stage sequence.
I like to think about lodging in three layers. First are the high, exposed nights where availability matters most. Then come the mid-route stops where you can be a little more flexible. Finally, there are the start and finish towns, which are easiest to adjust if the rest of the plan shifts. Book the hardest-to-reach nights first, not the easy ones.
- Reserve the nights over the biggest passes first, because those beds disappear fastest.
- Lock in the arrival and departure towns next, so your travel days are fixed.
- Fill the middle stages around those anchors instead of trying to force every night to fit a perfect pattern.
- Check what is included, especially dinner, breakfast, packed lunch, bedding, and shower access.
It also helps to know the vocabulary. A refuge is usually basic, social, and very mountain-focused. A lodge or guesthouse may be more comfortable but less rustic. Half-board means dinner and breakfast are included, which is often the easiest option on this kind of trek. If you are carrying your own luggage, confirm the cutoff time for bag delivery, because even a small timing mistake can ruin a smooth arrival.
In peak summer, the best places can sell out well before departure. If I were planning a first trip, I would treat lodging as a fixed part of the route, not something I can improvise after landing in Europe. Once the beds are set, the budget becomes much easier to understand.
Budgeting for the hike and getting to the trailhead
I would budget a self-guided trek in two separate layers: the cost of reaching the trailhead and the cost of staying on the trail. Geneva is the easiest gateway for many U.S. travelers, and the Chamonix area is well connected by transfer, bus, and train. In practical terms, that means you do not need a rental car just to complete the loop.
| Item | Typical planning range | Notes |
|---|---|---|
| Shared refuge or hut bed with half-board | €70 to €130 per night | Good value if you are happy with dorm-style stays and simple mountain meals |
| Private room or more comfortable lodge | €120 to €220+ per night | Costs rise quickly in peak season and in places with limited inventory |
| Geneva shared shuttle | €30 to €40 per person one way | A common choice if you are arriving on a normal schedule and traveling light |
| Geneva private transfer | From about €150 one way | Worth it if you are arriving late, want door-to-door service, or are traveling in a group |
| Trail snacks and lunch top-ups | €10 to €20 per day | Higher if you buy more food on the fly instead of carrying provisions |
| Total trek budget | About €900 to €1,800 for a shared-hut trip, or €1,800 to €3,500+ for more comfort | These are planning ranges, not fixed prices, and your final total will depend on season, room type, and transfer style |
That range is broad on purpose, because the trip can be surprisingly economical or fairly luxurious depending on how you build it. The biggest budget swing usually comes from room type and transfer choices, not from the walking itself. If you add luggage transfer, private rooms, and nicer lodges, the price can climb quickly. If you keep things simple and stay in shared accommodation, the trip becomes much easier to justify.
From a routing standpoint, I like the fact that the valley itself is easy to move around in, so you can connect stage starts and ends without adding a rental car to the equation. With the money side roughly mapped out, the next issue is not cost. It is the gear that keeps a mountain day comfortable instead of exhausting.
What to pack and where self-guided hikers usually get caught out
The standard circuit is hiking, not mountaineering, but that does not make it casual. Weather can swing fast, temperatures drop quickly with elevation, and even well-maintained trails become a different experience once fatigue sets in. I would pack for layered comfort rather than for a perfect forecast, because the perfect forecast is not what the Alps tend to deliver for long.
- Broken-in trail shoes with enough grip for steep descent and loose rock
- Light trekking poles, which help more on descents than many hikers expect
- A waterproof shell and a warm mid-layer that still works when damp
- At least 1 to 1.5 liters of water capacity, plus a way to refill safely
- Sun protection, including sunglasses, sunscreen, and a hat
- Energy snacks, because long climbs and late arrivals are easier with quick calories
- A small first-aid kit with blister care
- Passport, insurance details, cash, and a power bank
- Offline maps or a GPX track on your phone, even if the trail is signed
The most common mistake is not dramatic. It is underestimating the cumulative effect of long days, sun exposure, and descents on tired legs. Another common mistake is starting too late. If you cross the higher ground early in the day, you reduce your weather risk and usually enjoy better light, too. I would also check conditions every morning rather than assuming yesterday’s trail status still holds.
Mountain access can change with snow, storms, or maintenance work, so the safest habit is to verify the current trail situation before you leave each stage. That leads naturally to the last part of the puzzle: the pace and discipline that make the whole loop feel manageable.
The small habits that make the whole loop feel smoother
When I look at successful self-guided treks, the difference is rarely heroics. It is discipline. The hikers who enjoy the route most are usually the ones who leave early, keep their pack light, and do not try to squeeze every scenic stop into the hardest hours of the day.
- Start early enough to clear the bigger climbs before noon.
- Keep the first hour conservative so your legs settle into the day.
- Confirm breakfast and packed-lunch times the night before.
- Carry a backup stage idea in case weather forces a change.
- Keep some cash in your pocket, because card acceptance is not uniform everywhere.
- Be willing to use a valley bus, cable car, or transfer if it prevents a bad-weather push.
I would also keep one mental rule in place: if a stage feels too tight on paper, it will feel tighter on the trail. Adding just one extra night to the itinerary can change the trip from stressful to enjoyable. That is especially true if you want time for photos, coffee stops, or a slower descent after lunch.
The best self-guided version of this trek is not the fastest one. It is the one that leaves enough margin for weather, tired legs, and a few unplanned pauses to simply look up. With that margin in place, the loop feels less like a puzzle and more like the kind of Alpine journey people remember for years.
The margin that turns a hard trek into a good one
If I were planning this trip for the first time, I would focus on three things before anything else: book the hardest nights first, choose a pace that leaves room for weather, and keep the gear list simple but reliable. Those three decisions do more to shape the trip than any scenic description ever will.The Tour du Mont Blanc rewards hikers who respect its scale. It is not a technical expedition, but it is also not a casual walk with views. If you treat the itinerary as a sequence of mountain days that need real recovery, the circuit is one of the most satisfying self-planned treks in Europe.
For most hikers, the smartest first attempt is a mid-season start, a 7- to 9-day rhythm, and a lodging plan that does not force daily improvisation. That combination gives you the best chance of finishing strong instead of just finishing.